

Since we have successfully created a VPC, today we shall look at the steps that are followed to create an EC2 server in a Private subnet.
We will be creating these servers via Launch templates. A launch template is needed to attach to an Auto-scaling group which makes sure the desired no of instances are always running.
We will be following the below steps to successfully launch an EC2 instance in a private subnet :
We will first create a launch template
Next, attach it to an autoscaling group that automatically scales instances based on traffic
Moving on, we shall launch instances in a private subnet through the template that we just created.
Creating a launch template
Search for EC2 in the search bar, once the EC2 homepage loads, click on the launch template on your left side

Provide a name and a description for this server

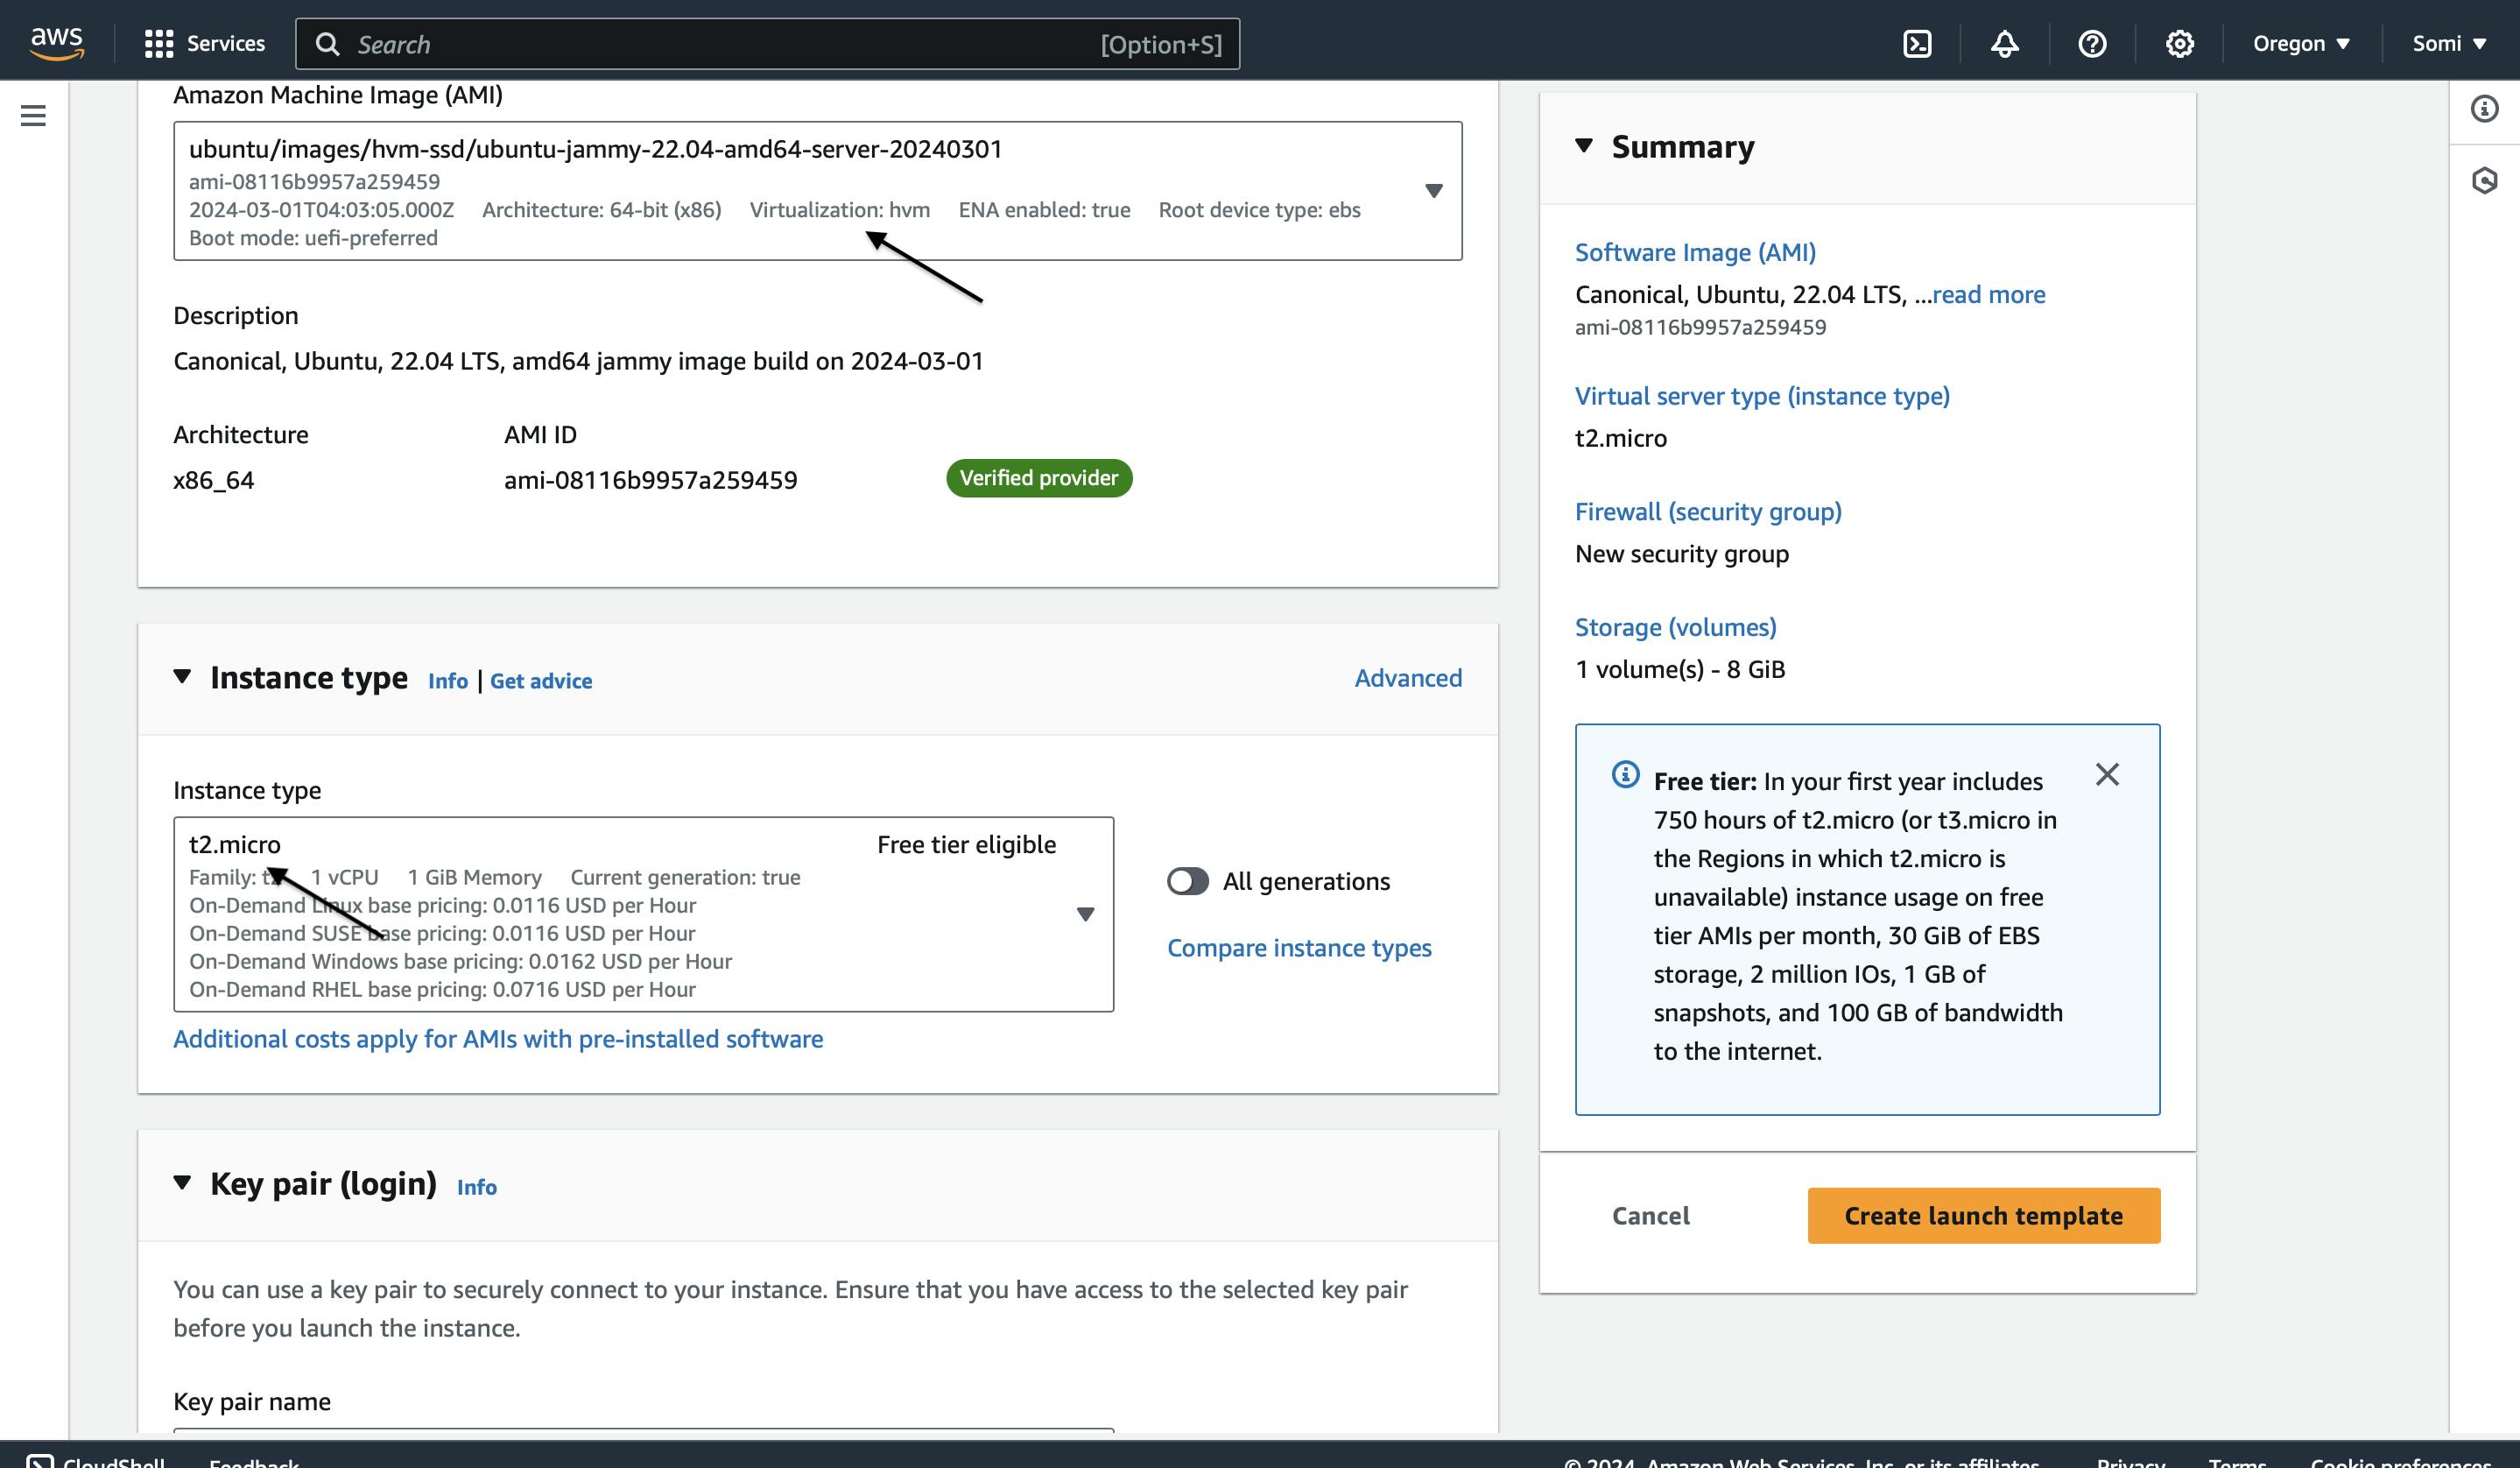
Scroll down and select the instance, ami and key pair.
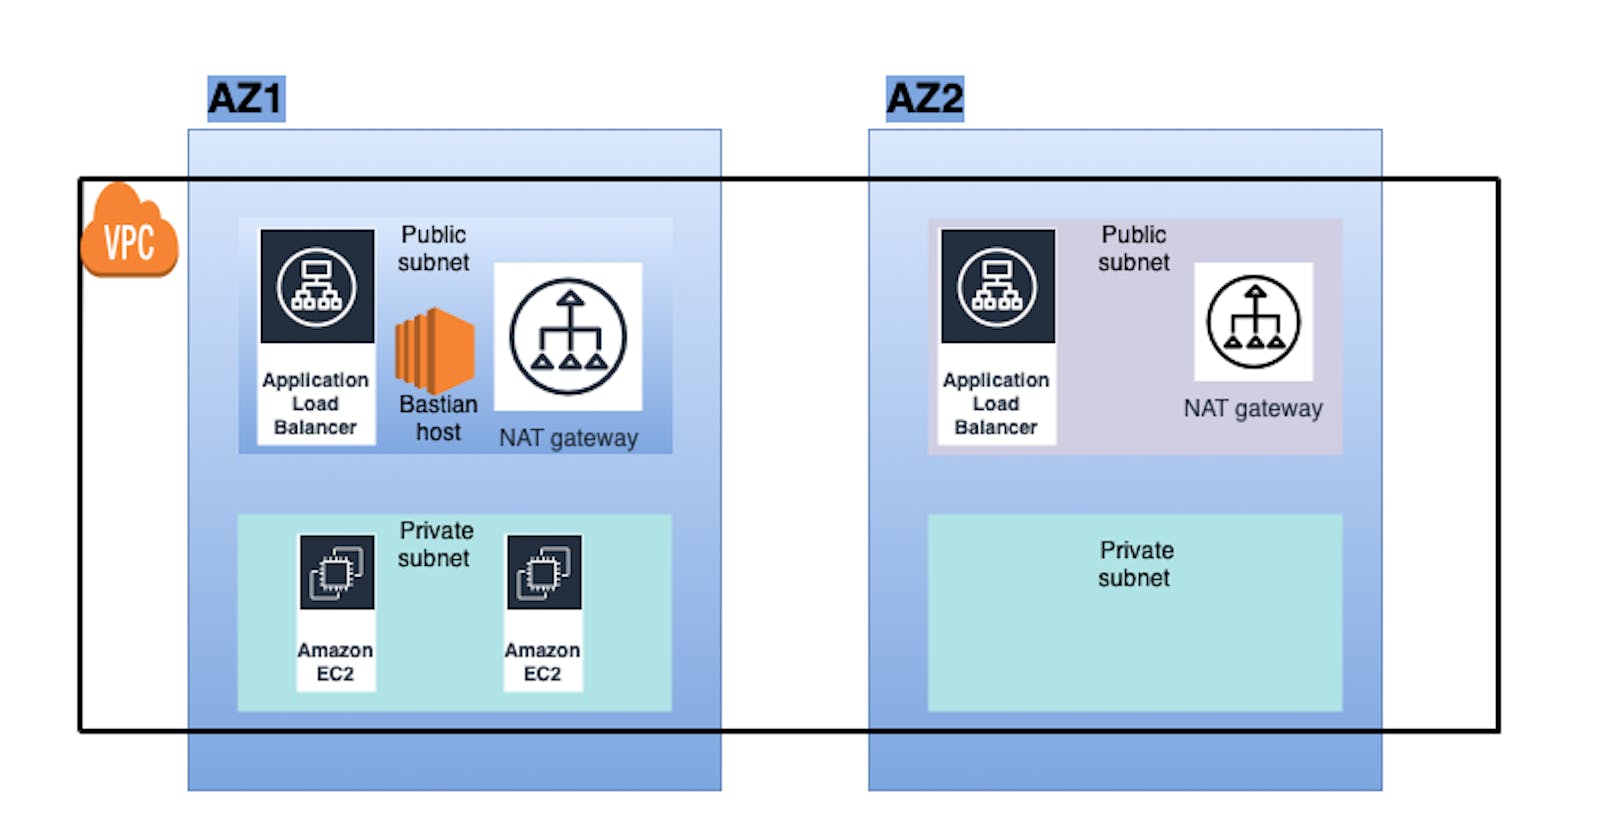
In the network settings, select the VPC that you created as per my previous blog.
Create a new security group rule to allow port 22 for SSH access and 5000 for the application

Click on "Create launch template"

Creating Auto-scaling group.
Once the launch template is created, we shall move on to creating an auto scaling group.
Go back to EC2 home page and select Auto scaling group on the right bottom of your screen
Click on "Create auto-scaling group"
Provide the auto scaling group name and select the launch template that we just created.

In the next page, select the VPC in which we wish to launch the instance and the subnet. Be sure to select the Private subnet in both Availability Zones

Click Next and there are no settings to be done on this page as we will be creating a load balancer separately

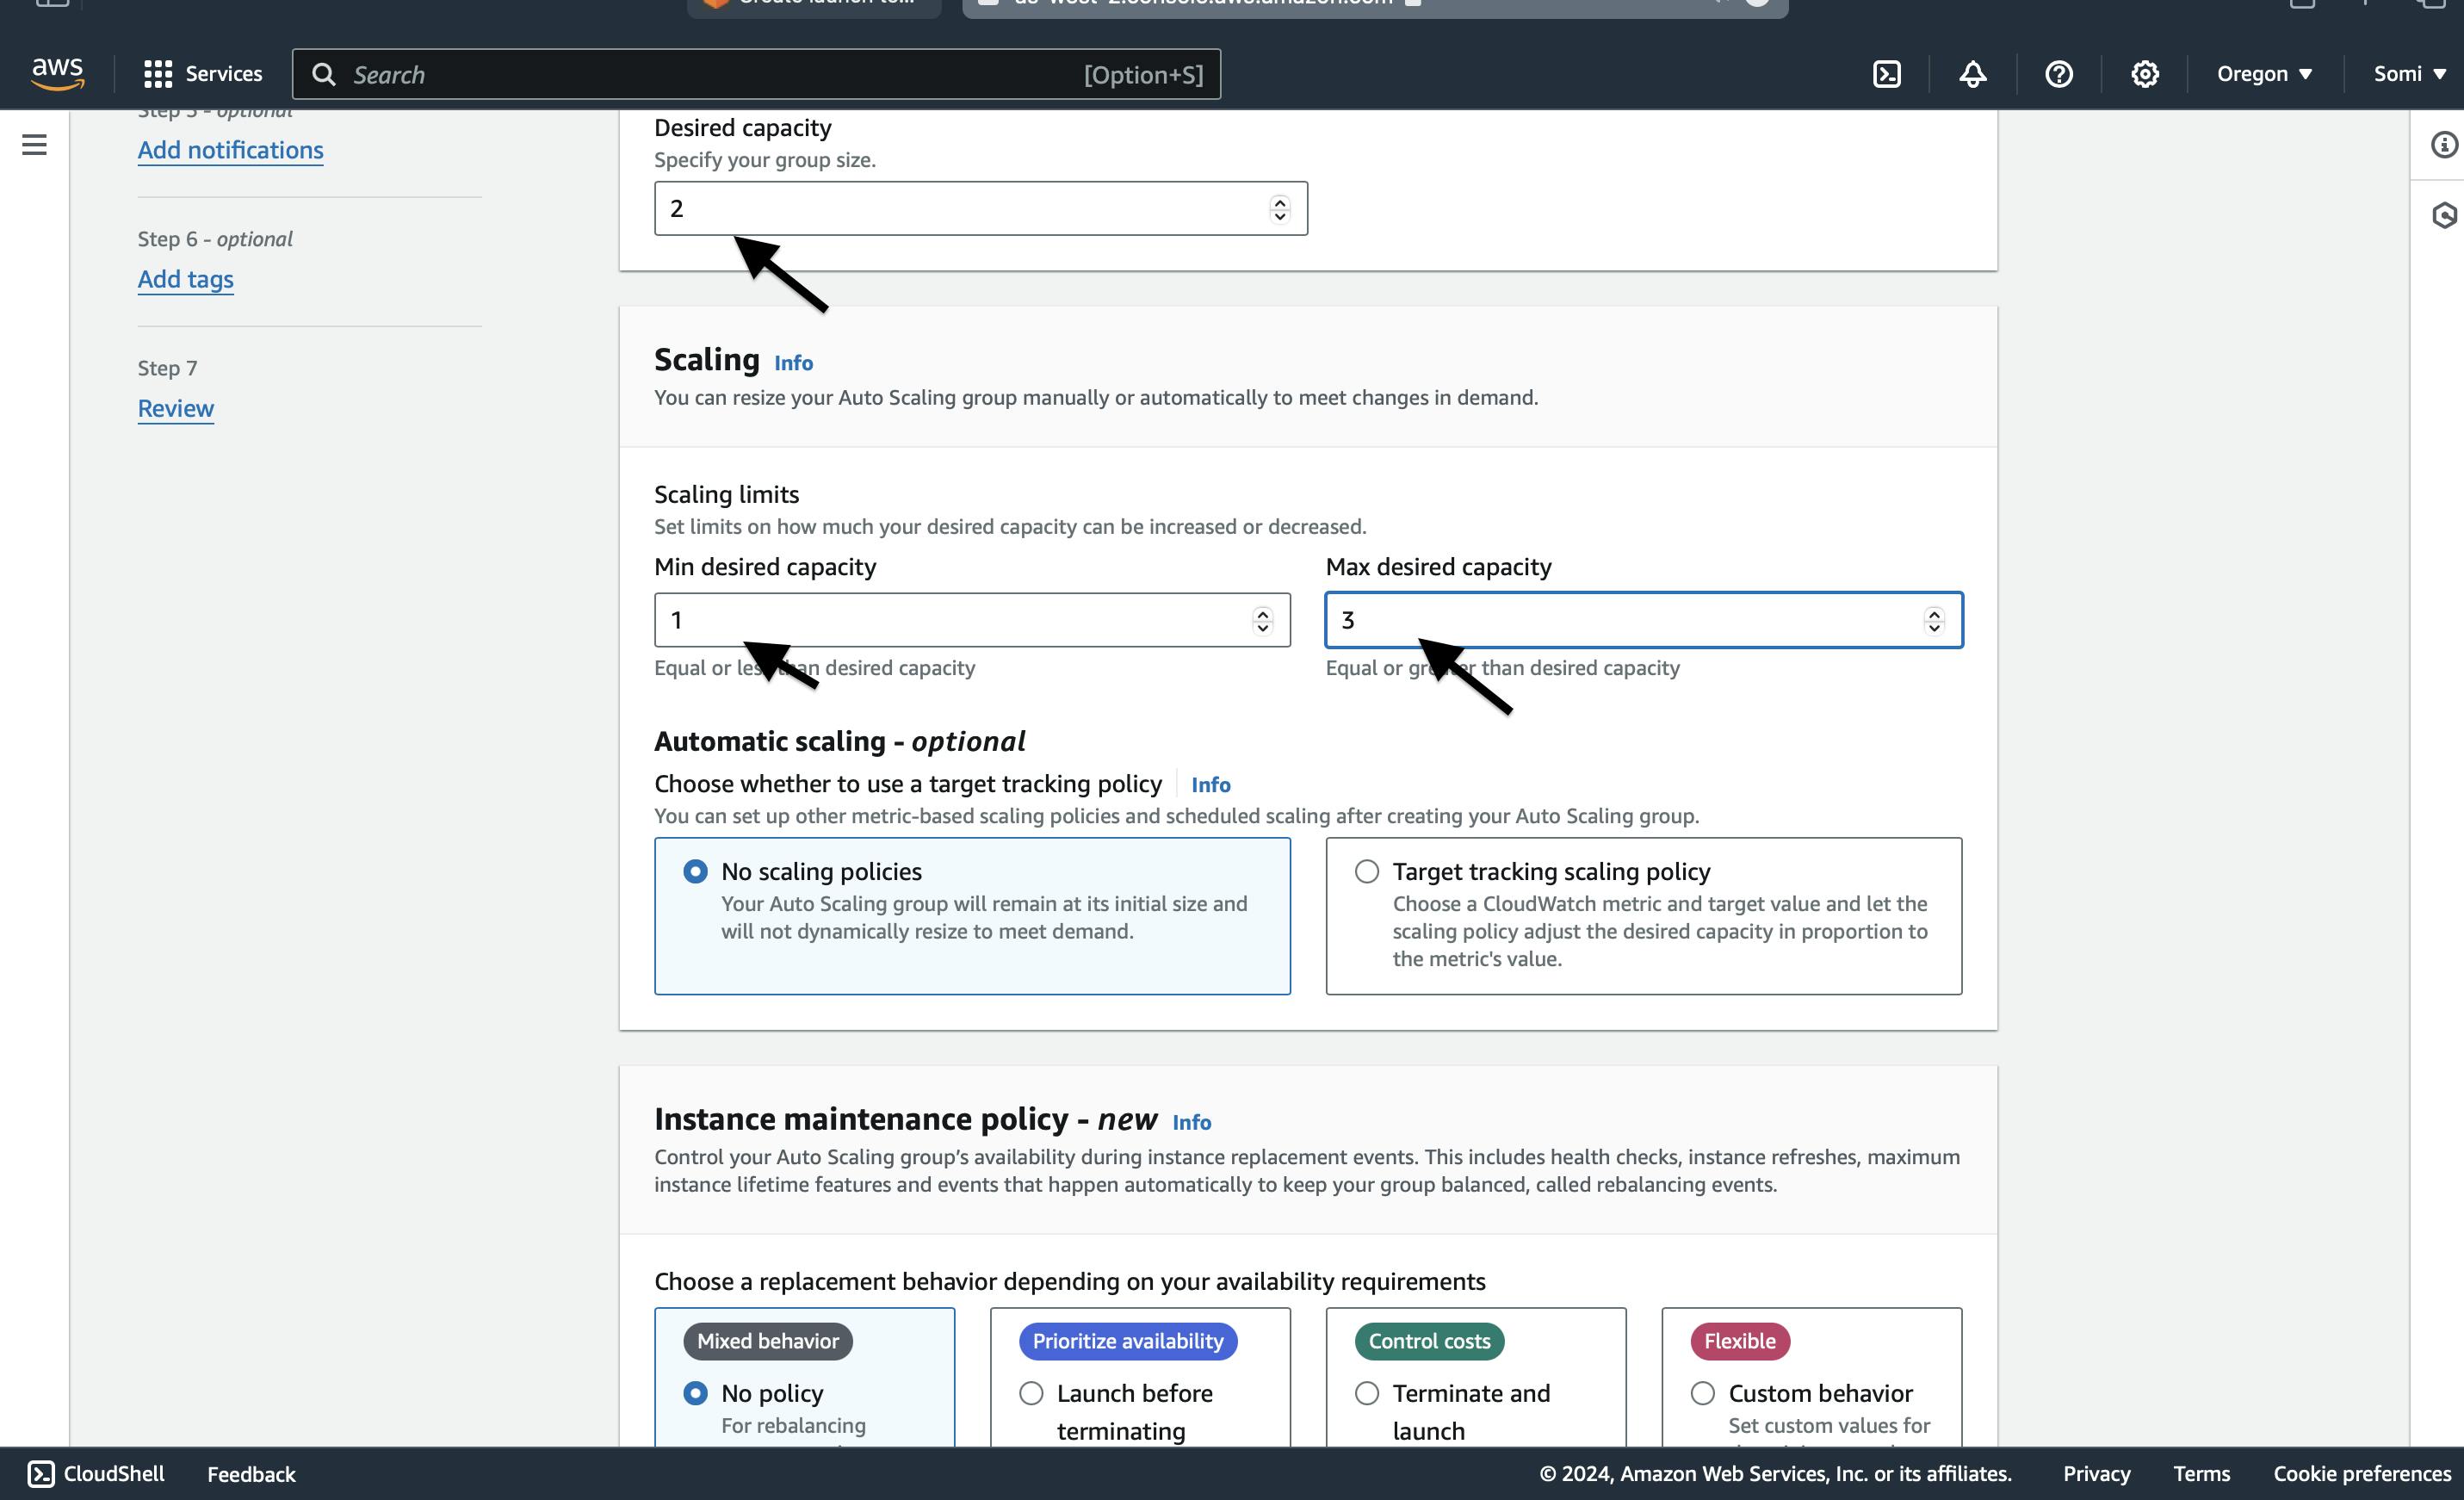
Just click Next, and move on to the next page to configure group size and scaling
Here, fill in the desired, max and minimum capacity
Click on Next, skip the Notifications and tags page as we are not adding any.
Land on the review page. Check for all the settings, scroll down and then click create scaling groups

We can now check in the EC2 page if the desired no of instances are launched
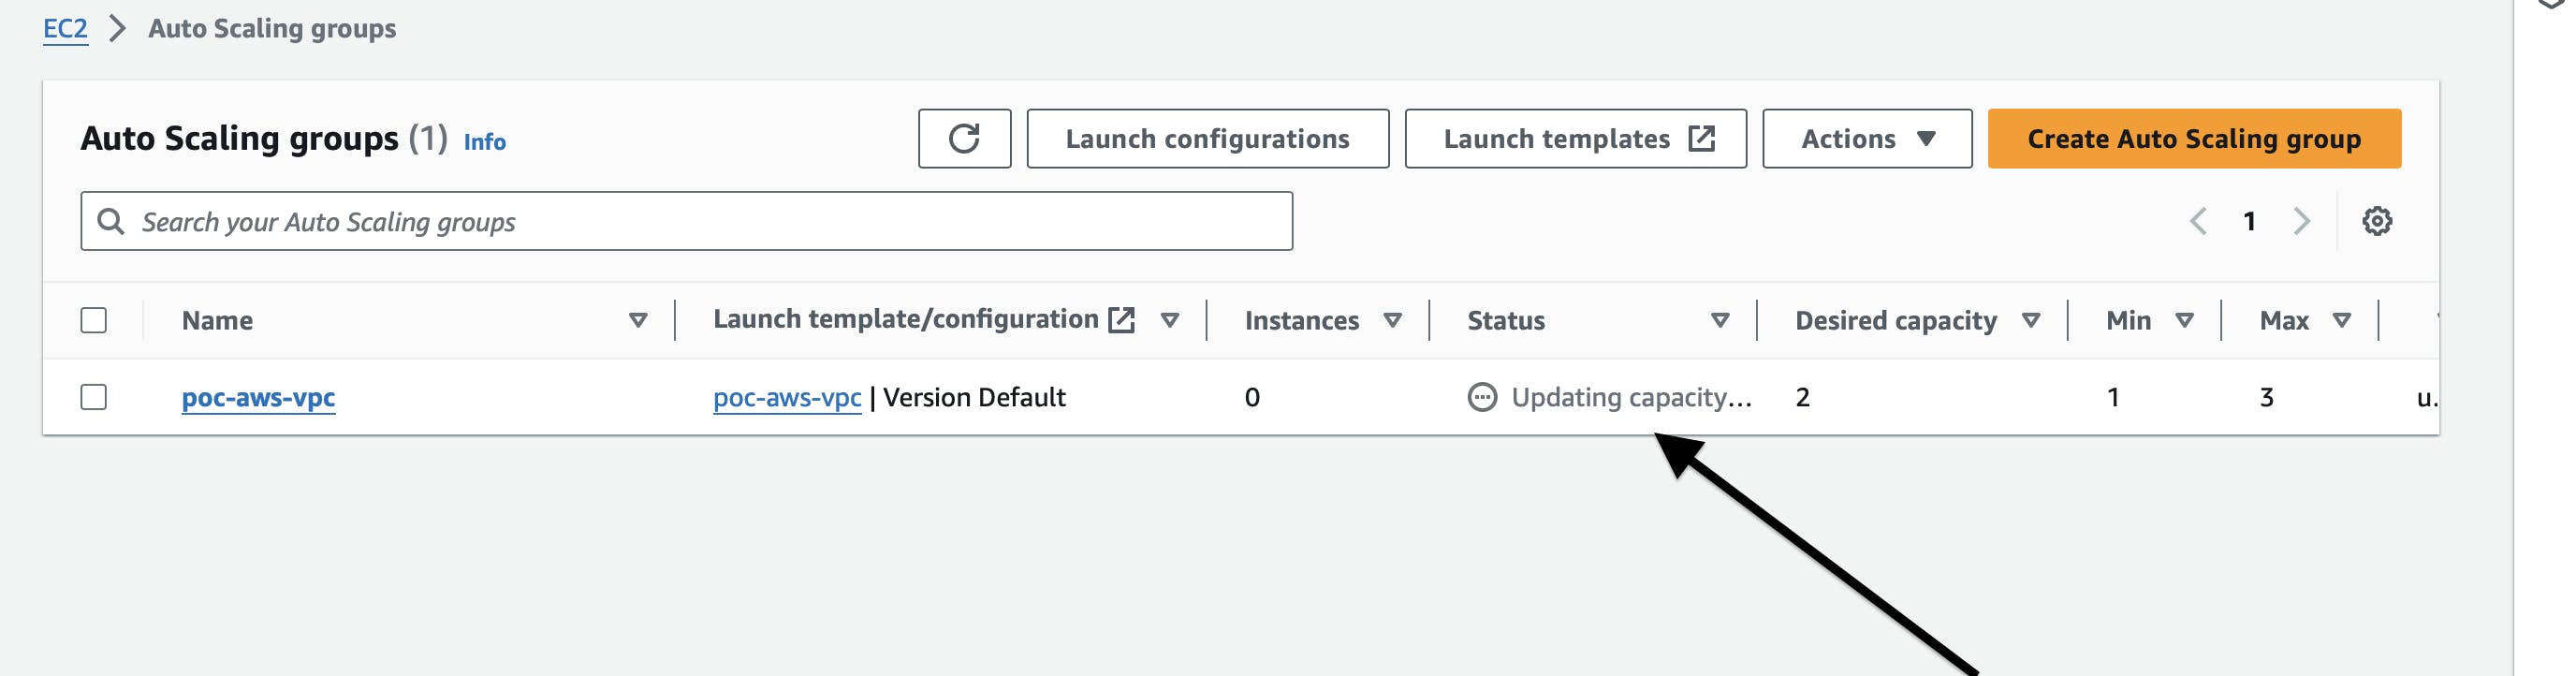

We can see that 2 instances are created in the private subnet as per our requirement. The next step is to log in to these instances through a bastion server and deploy our server. Follow my next blog to do this