Part3: 2-tier-app-deployment


Hello learners! Today, we shall be deploying the Flask app on a Kubeadm setup. You can visit this blog to set up your k8s on a kubeadm.
Now, we have already deployed the application through docker and docker-compose. Why are we trying to deploy the same application via k8s?
The answer is that docker does not have the feature of auto-scaling. In case there's a sudden increase in traffic, these containers might crash eventually leading to app failures.
This can be overcome through k8s, with its rich features such as auto-scaling and auto-healing. In case, there is an increase in traffic, k8s can automatically scale up the no. of containers and vice-versa. Similarly, if any pod dies or crashes due to any internal or external causes, k8s can create a new pod (which has a container in it) because of its robust architecture thus running the app smoothly.
Let us now move on to deploying the application via k8s.
Generally, to deploy an application, we need a container. However, in the case of k8s, we create a pod that has a container inside it inside which the application is running. So, let us first write a manifest file to create a pod.
As we already know, our 2-tier app is a todo app is in flask framework and has mysql as the database. Let us first create the pod for database ie mysql
Creating MySQL pod
mysql-deployment.yml
 apiVersion: apps/v1
 kind: Deployment
 metadata:
   name: mysql
   labels:
     app: mysql
 spec:
   replicas: 2
   selector:
     matchLabels:
       app: mysql
   template:
     metadata:
       labels:
         app: mysql
     spec:
       containers:
         - name: mysql
           image: mysql:latest
           env:
             - name: MYSQL_ROOT_PASSWORD
               value: "admin"
             - name: MYSQL_DATABASE
               value: "mydb"
             - name: MYSQL_USER
               value: "admin"
             - name: MYSQL_PASSWORD
               value: "admin"
           ports:
             - containerPort: 3306
           volumeMounts:
             - name: mysqldata
               mountPath: /var/lib/mysql         # this is your container path from where your data will be stored
       volumes:
         - name: mysqldata
           persistentVolumeClaim:
             claimName: mysql-pvc    # PVC claim name
We shall deploy this through the command:
kubectl apply -f mysql-deployment.ymlSince MySQL is a database, it needs a volume attached. Let us create the Persistent Volume for MySQL through a manifest named mysql-pv.yml and the contents will be as below,
 apiVersion: v1
 kind: PersistentVolume
 metadata:
   name: mysql-pv
 spec:
   capacity:
     storage: 256Mi
   volumeMode: Filesystem
   accessModes:
     - ReadWriteOnce
   persistentVolumeReclaimPolicy: Retain
   hostPath:
     path: /home/ubuntu/two-tier-flask-app/mysqldata        #This is your host path where your data will be stored. Make sure to create mysqldata directory in mentioned path
Let us apply this through the command:
kubectl apply -f mysql-pv.yamlThe volume is created, we shall claim this volume through Persistent Volume Claim manifest file named mysql-pvc.yaml and the contents will be as below;
 apiVersion: v1
 kind: PersistentVolumeClaim
 metadata:
   name: mysql-pvc
 spec:
   accessModes:
     - ReadWriteOnce
   resources:
     requests:
       storage: 256Mi
Let us deploy this through the command:
kubectl apply -f mysql-pvc.yamlNext, we shall create a service for our flask app to access this mysql database. Since the whole communication is within the cluster, a ClusterIP Service is created through mysql-svc.yaml with the contents as below
 apiVersion: v1
 kind: Service
 metadata:
   name: mysql
 spec:
   selector:
     app: mysql
   ports:
     - port: 3306
       targetPort: 3306
Now, we shall create this service with the command
kubectl apply -f mysql-svc.yamlNext we shall connect to the worker node and check for mysql container.
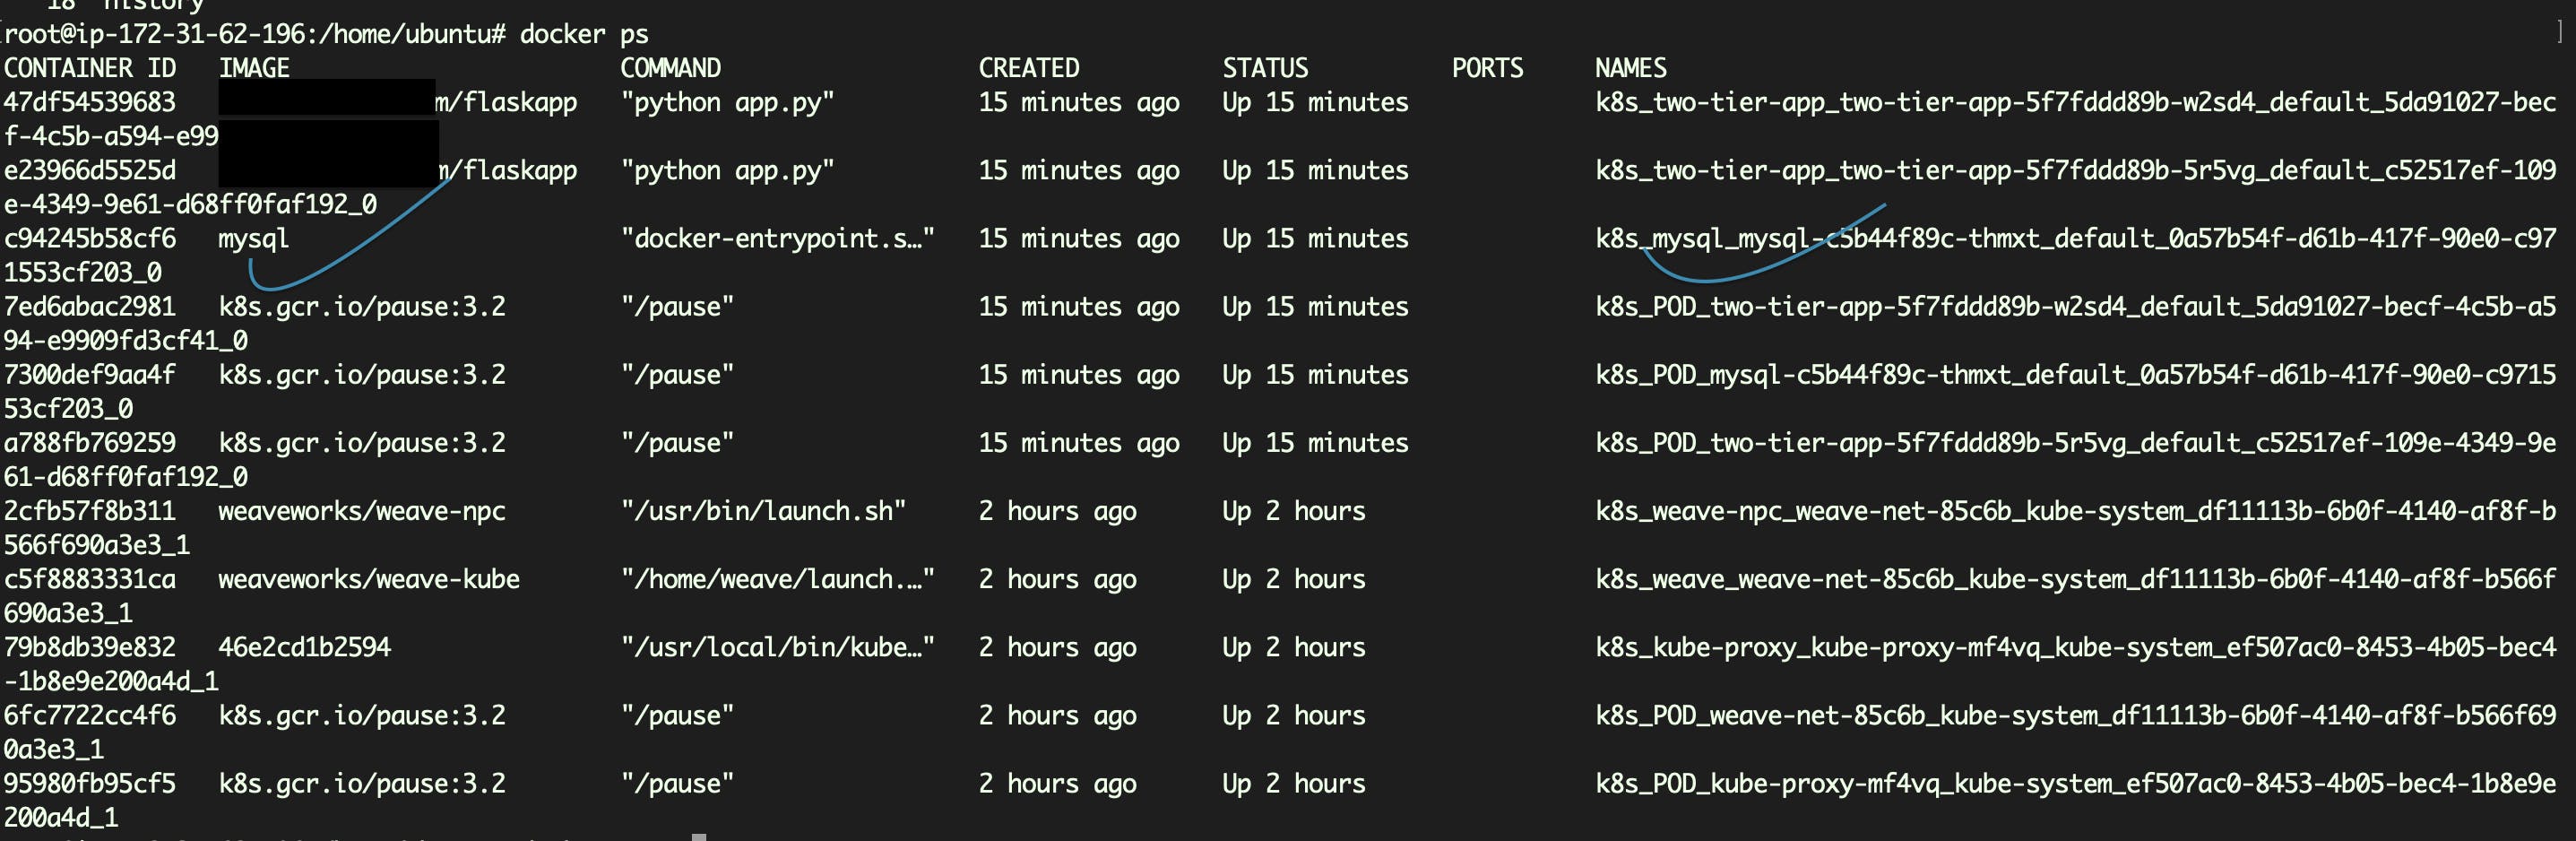
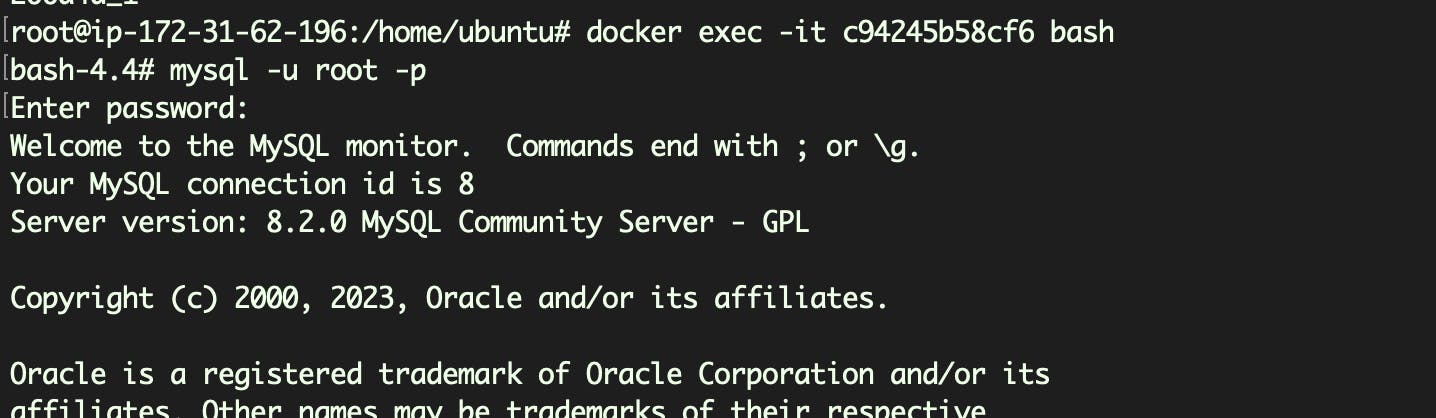
Get into the container and create a table in mydb database through the below mysql script
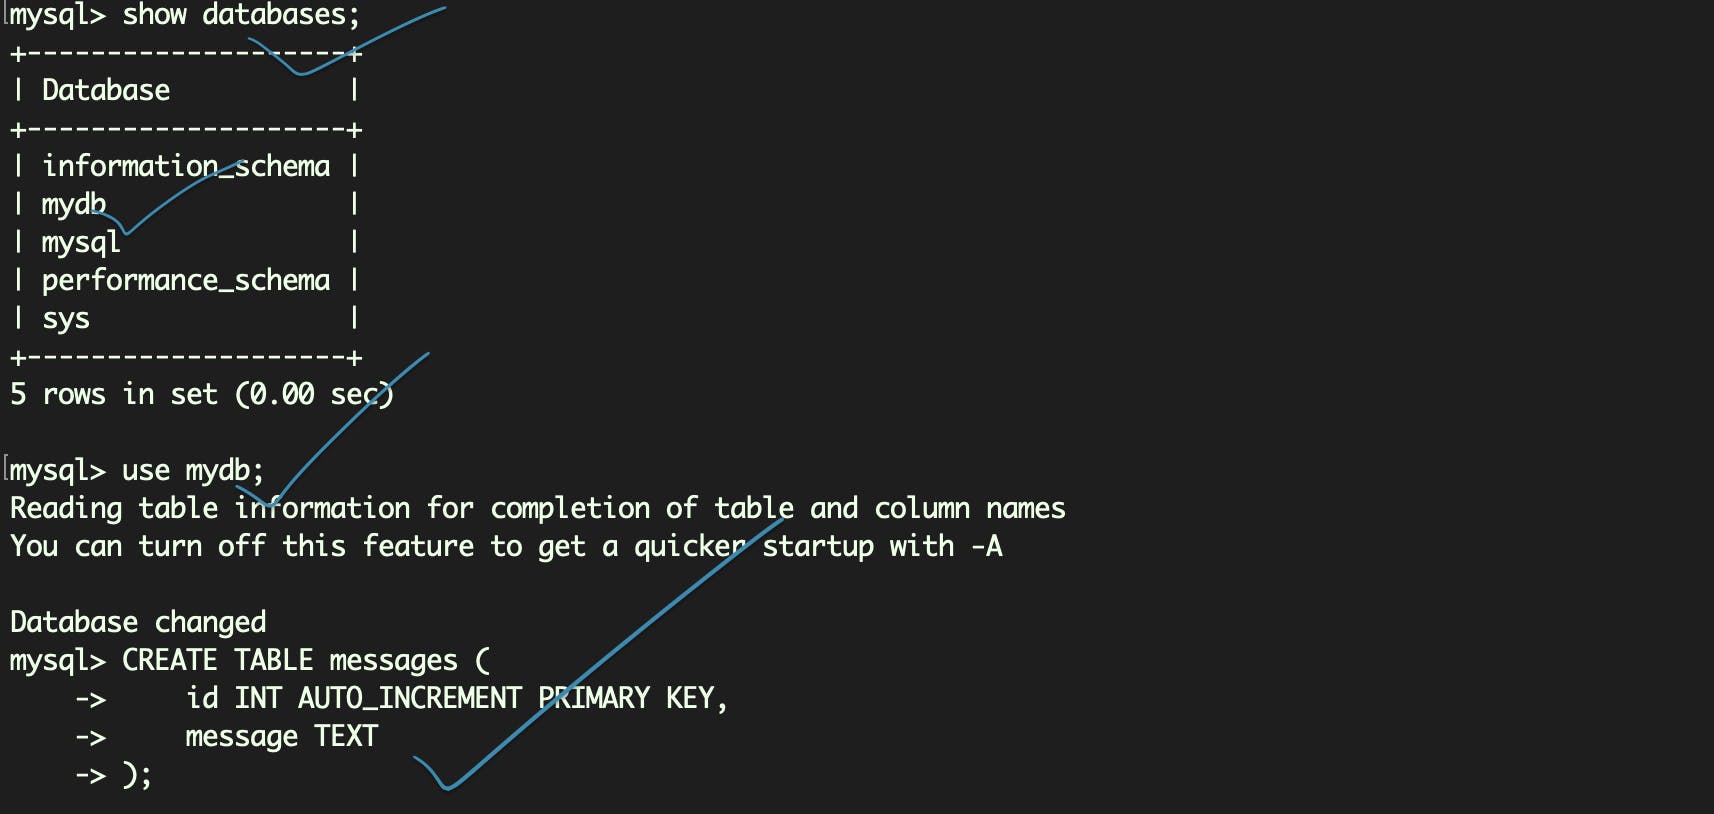
 CREATE TABLE messages (
     id INT AUTO_INCREMENT PRIMARY KEY,
     message TEXT
 );
Once, MySQL is created, we shall now move on to creating a deployment for flask-app
Creating flask-app deployment
The manifest to deploy this application is written in two-tier-app-deployment.yml file with the contents as below. Here, we have added the Cluster IP of the MySQL svc instead of the hostname so that the app can easily connect to the host without having to search fo rit
 apiVersion: apps/v1
 kind: Deployment
 metadata:
   name: two-tier-app
   labels:
     app: two-tier-app
 spec:
   replicas: 2
   selector:
     matchLabels:
       app: two-tier-app
   template:
     metadata:
       labels:
         app: two-tier-app
     spec:
       containers:
         - name: two-tier-app
           image: sowmyabm/flask-app:latest
           env:
             - name: MYSQL_HOST
               value: "10.104.65.241"         # this is your mysql's service clusture IP, Make sure to change it with yours
             - name: MYSQL_PASSWORD
               value: "admin"
             - name: MYSQL_USER
               value: "root"
             - name: MYSQL_DB
               value: "mydb"
           ports:
             - containerPort: 5000
           imagePullPolicy: Always
Use
kubectl apply -f two-tier-app-deployment.yamlto deploy the applicationNext, we shall create a service for the outside world to access this application through a manifest file named two-tier-app-svc.yaml. We are using a NodePort svc which uses node's port no 30004. We are binding the conatiner's port 5000 to node's 30004
 apiVersion: v1
 kind: Service
 metadata:
   name: two-tier-app-service
 spec:
   selector:
     app: two-tier-app
   ports:
     - protocol: TCP
       port: 80
       targetPort: 5000
       nodePort: 30004
   type: NodePort
Apply this service through the command
kubectl apply-f two-tier-ap-svc.yamlLet us check if all the deployments are successfully created through
kubectl get allcommand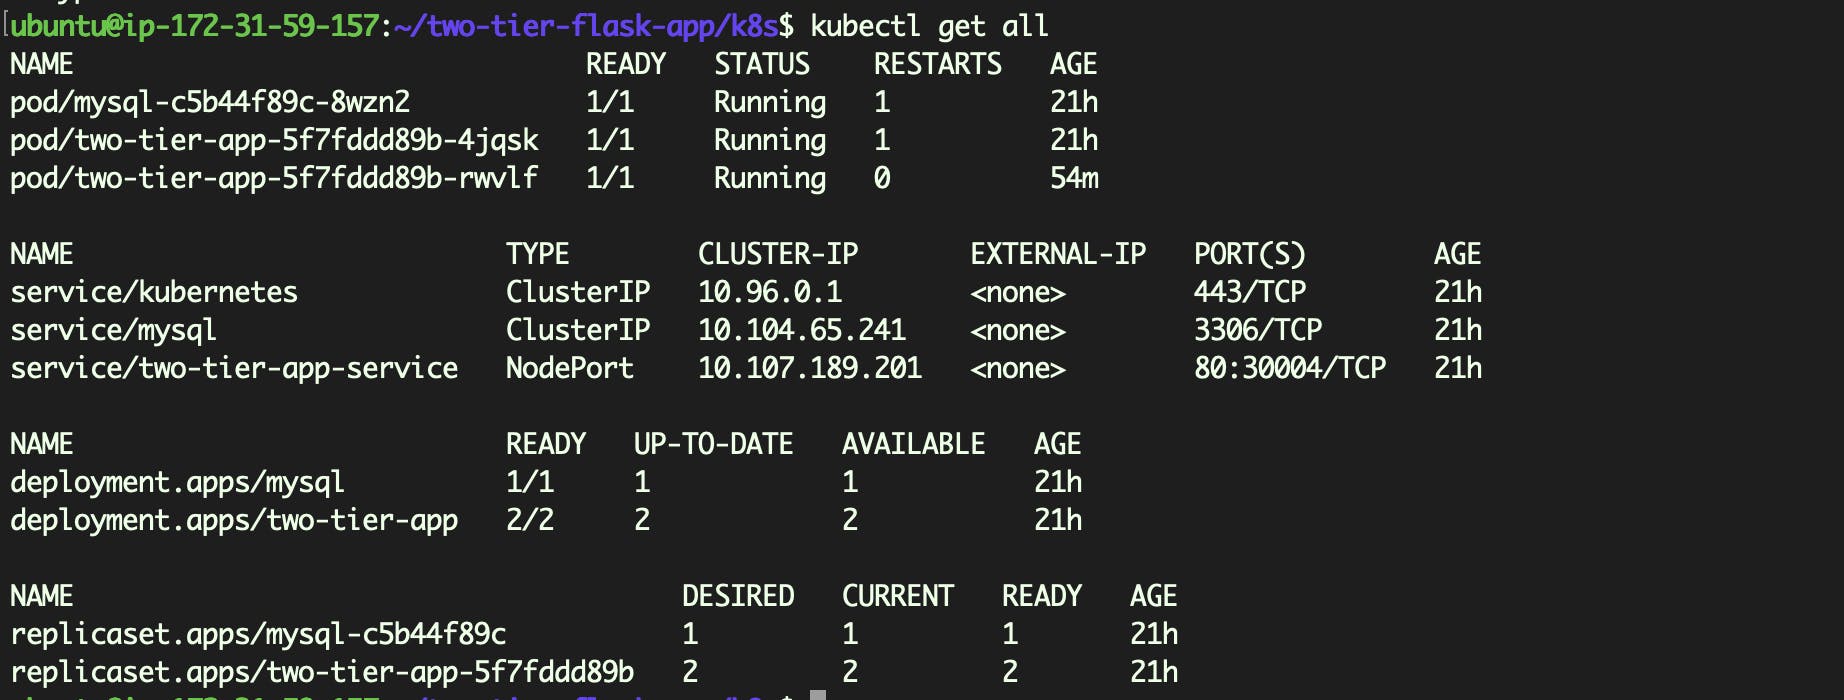
All the required services are running
Testing the application
Now, open 30004 in the worker nodes's inbound rule and check if the application is running through worker node's IP address
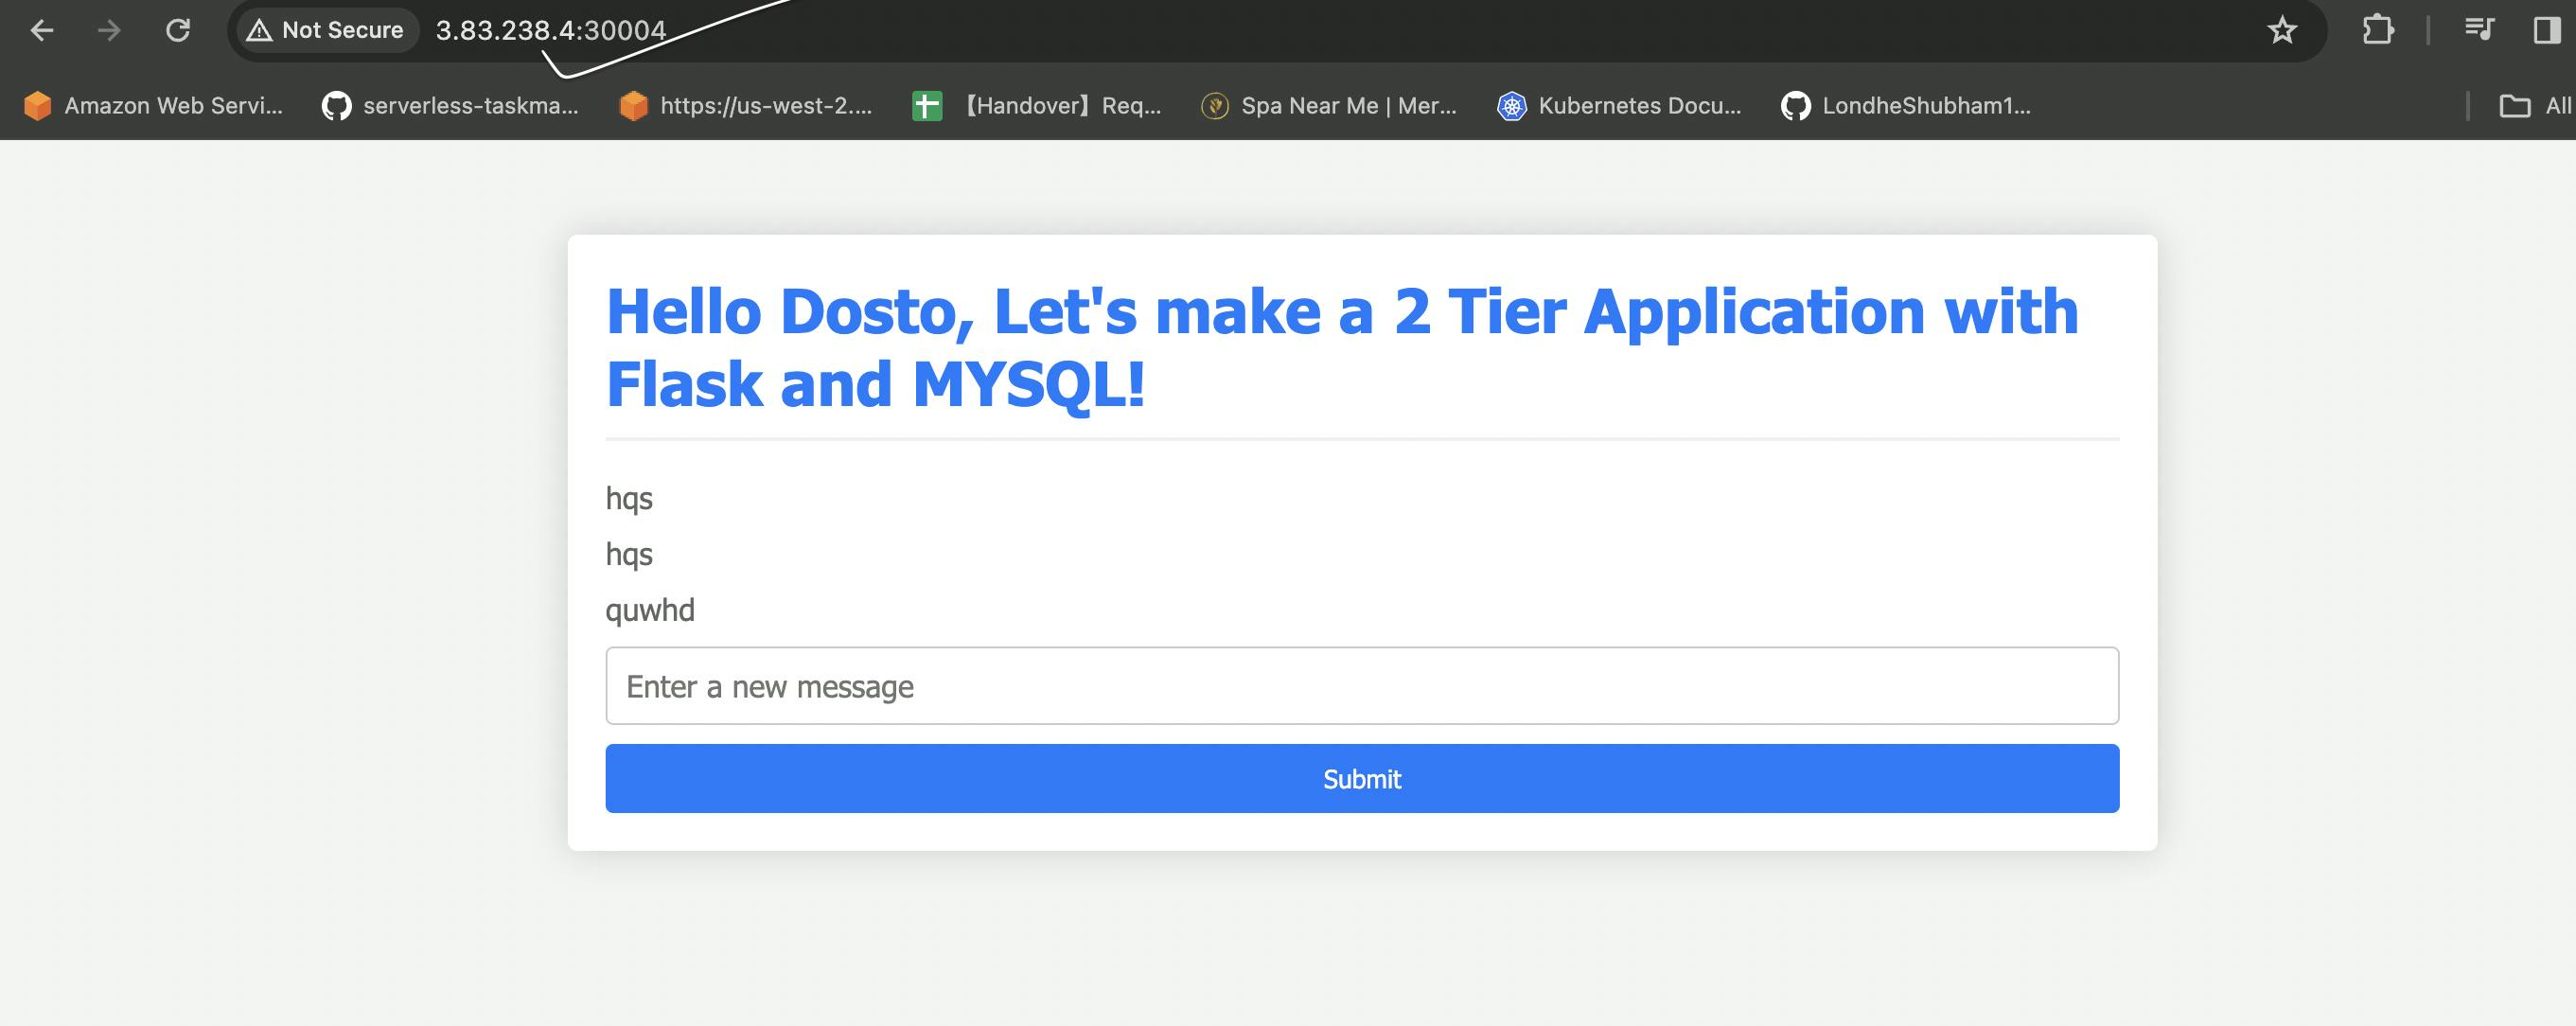
We can see that the application is successfully deployed on k8s cluster
Testing the auto-healing featue
Let us kill any of the pods and check what happens
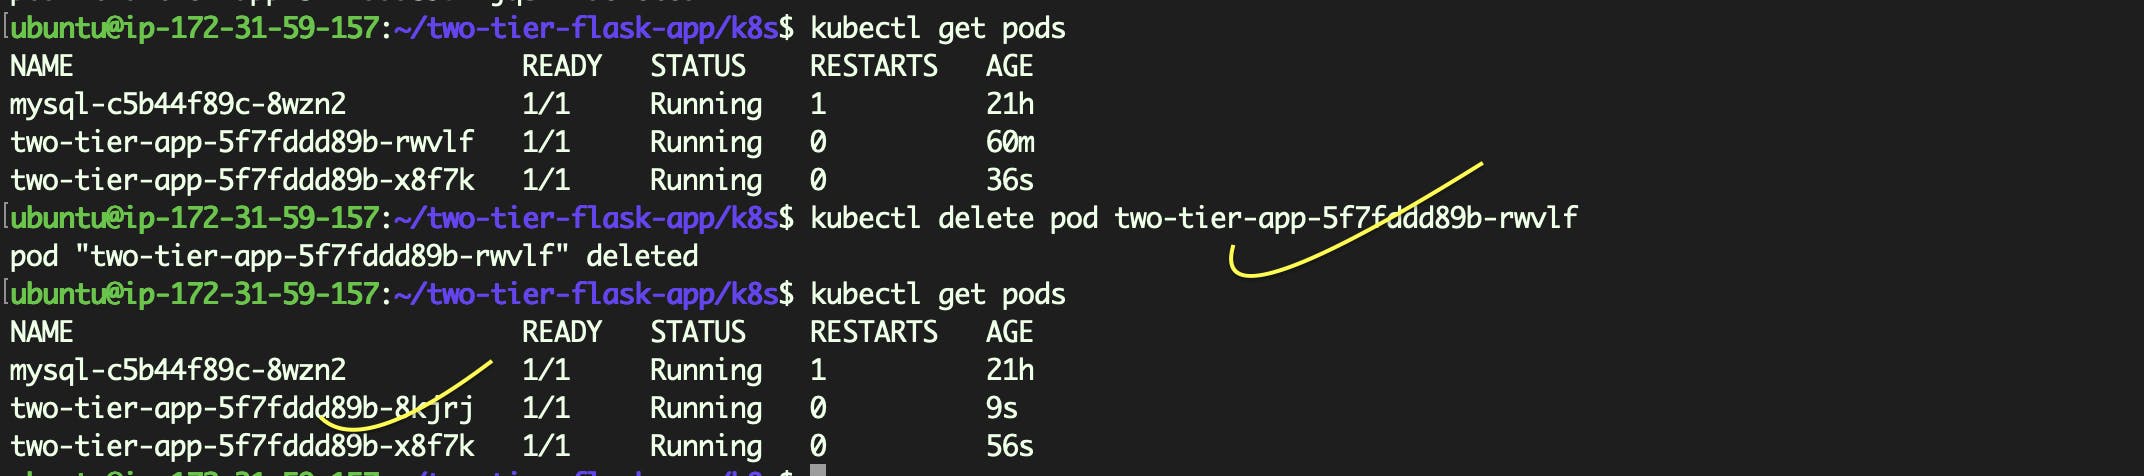
It is seen that a new pod is created in place of the old one as soon as we delete the old pod. So the app is auto-healed itself.
Summary
In this blog, we successfully created pods for MySQL and Flask app and integrated them and deployed them on k8s cluster.
We also tested the application for the auto-healing feature.
Next blog details:
Visit my next blog to learn how to simplify the deployment of this application and test for auto-scaling feature