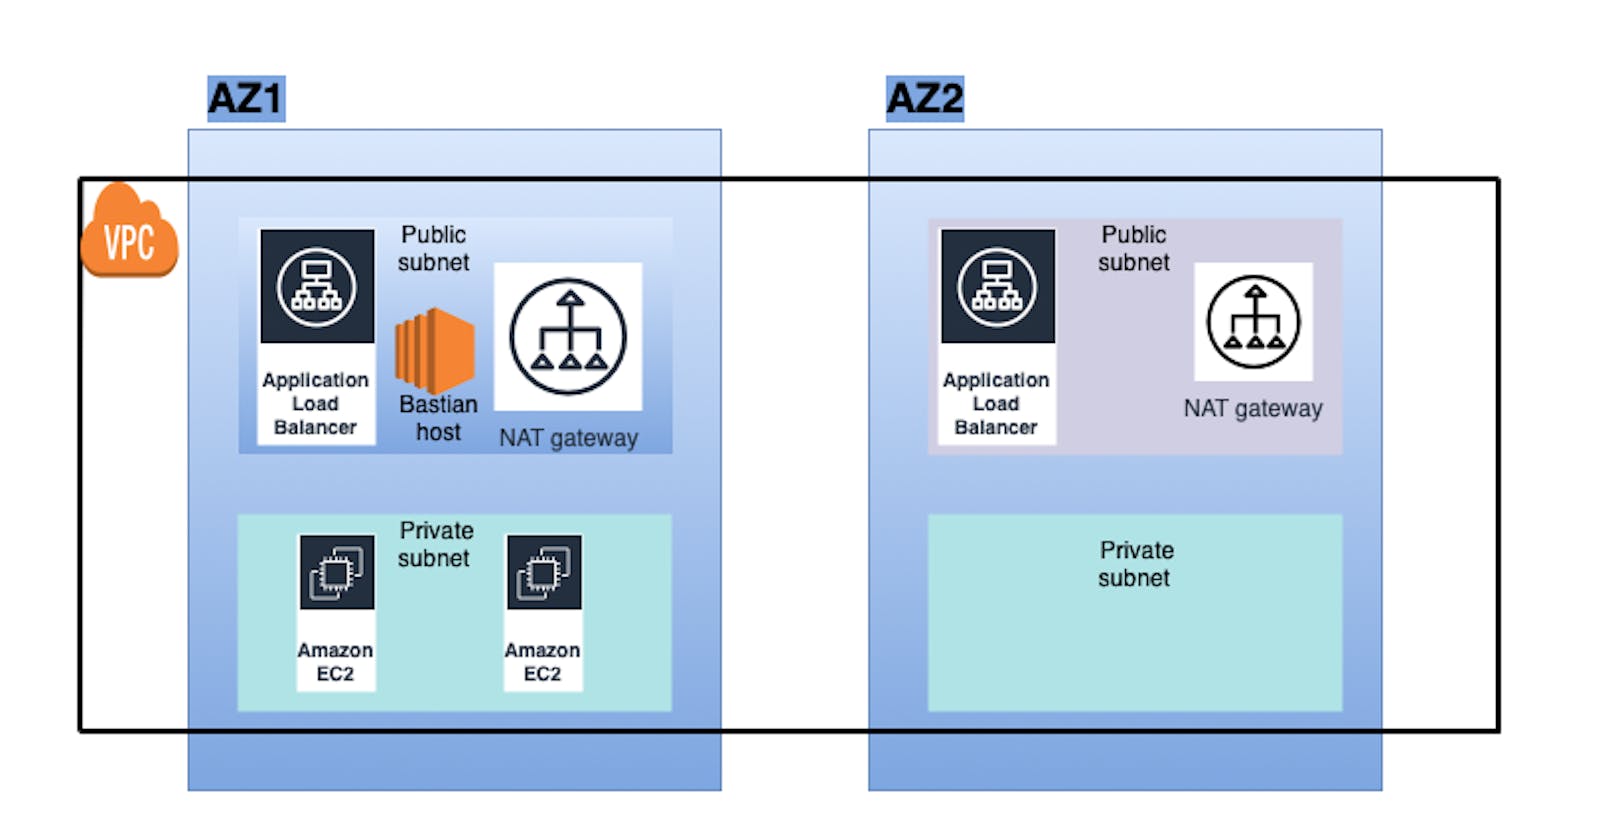


In the previous blog, we successfully logged into our servers in a private subnet of our VPC via Bastion host.
We shall be doing all these things today:
Deploy a Python server in the private subnet of our VPC
Attach a load balancer and access these servers via the load balancer's DNS.
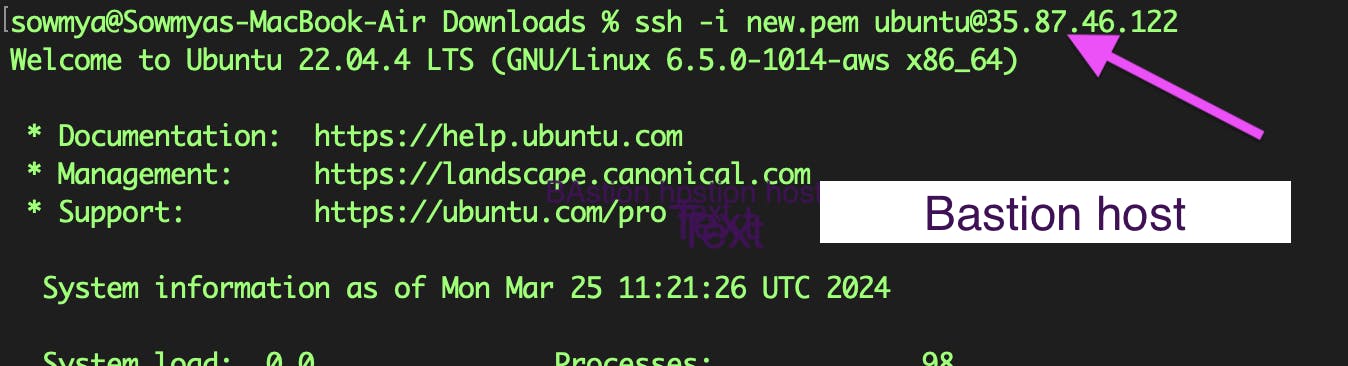
Lets start bt logging into the Private instance :
Login to our server in the private subnet by logging into the bastion host

We shall create a very simple HTML page and deploy a Python server
Create a file named index.html and the following contents to it

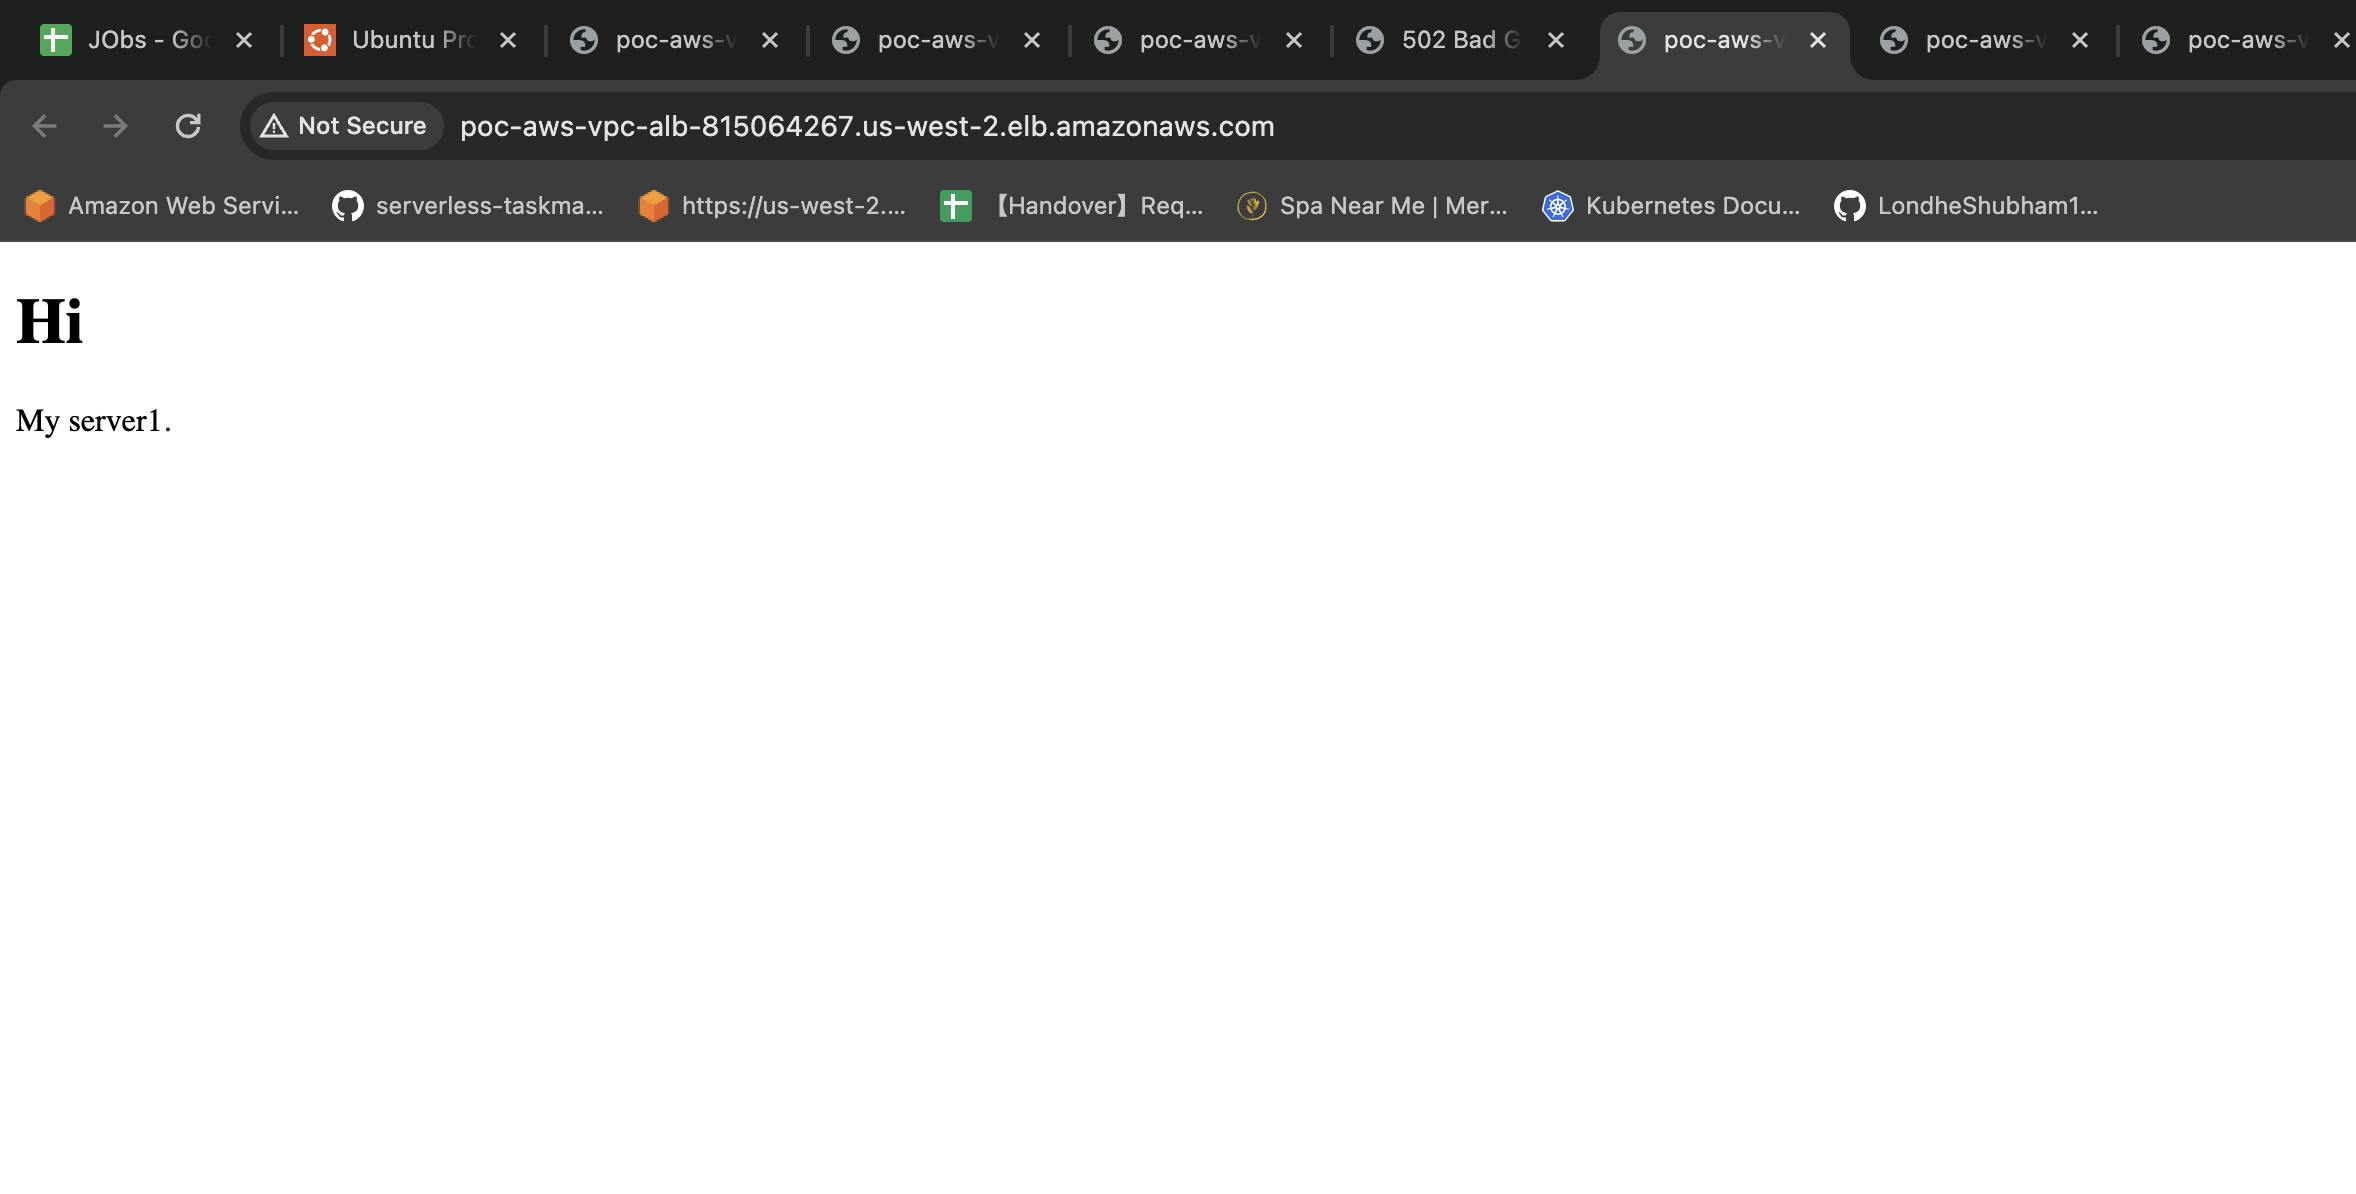
 <!DOCTYPE html>
 <html>
 <body>

 <h1>Hi</h1>
 <p>My server1.</p>

 </body>
 </html>
Deploy the server with the below command
python -m http.server 8000
Follow the same steps as above, login to the other server in the private subnet, deploy a different python server. I have made only minor changes in server2 to deploy a different server. The contents are as below,
 <!DOCTYPE html>
 <html>
 <body>

 <h1>hi</h1>
 <p>My server2</p>

 </body>
 </html>
Creating an application load balancer.
Go to EC2 homepage>Scroll down and click on "Load Balancer" in "Application load balancer" section
Select "Application load balancer"> Click on "Create"
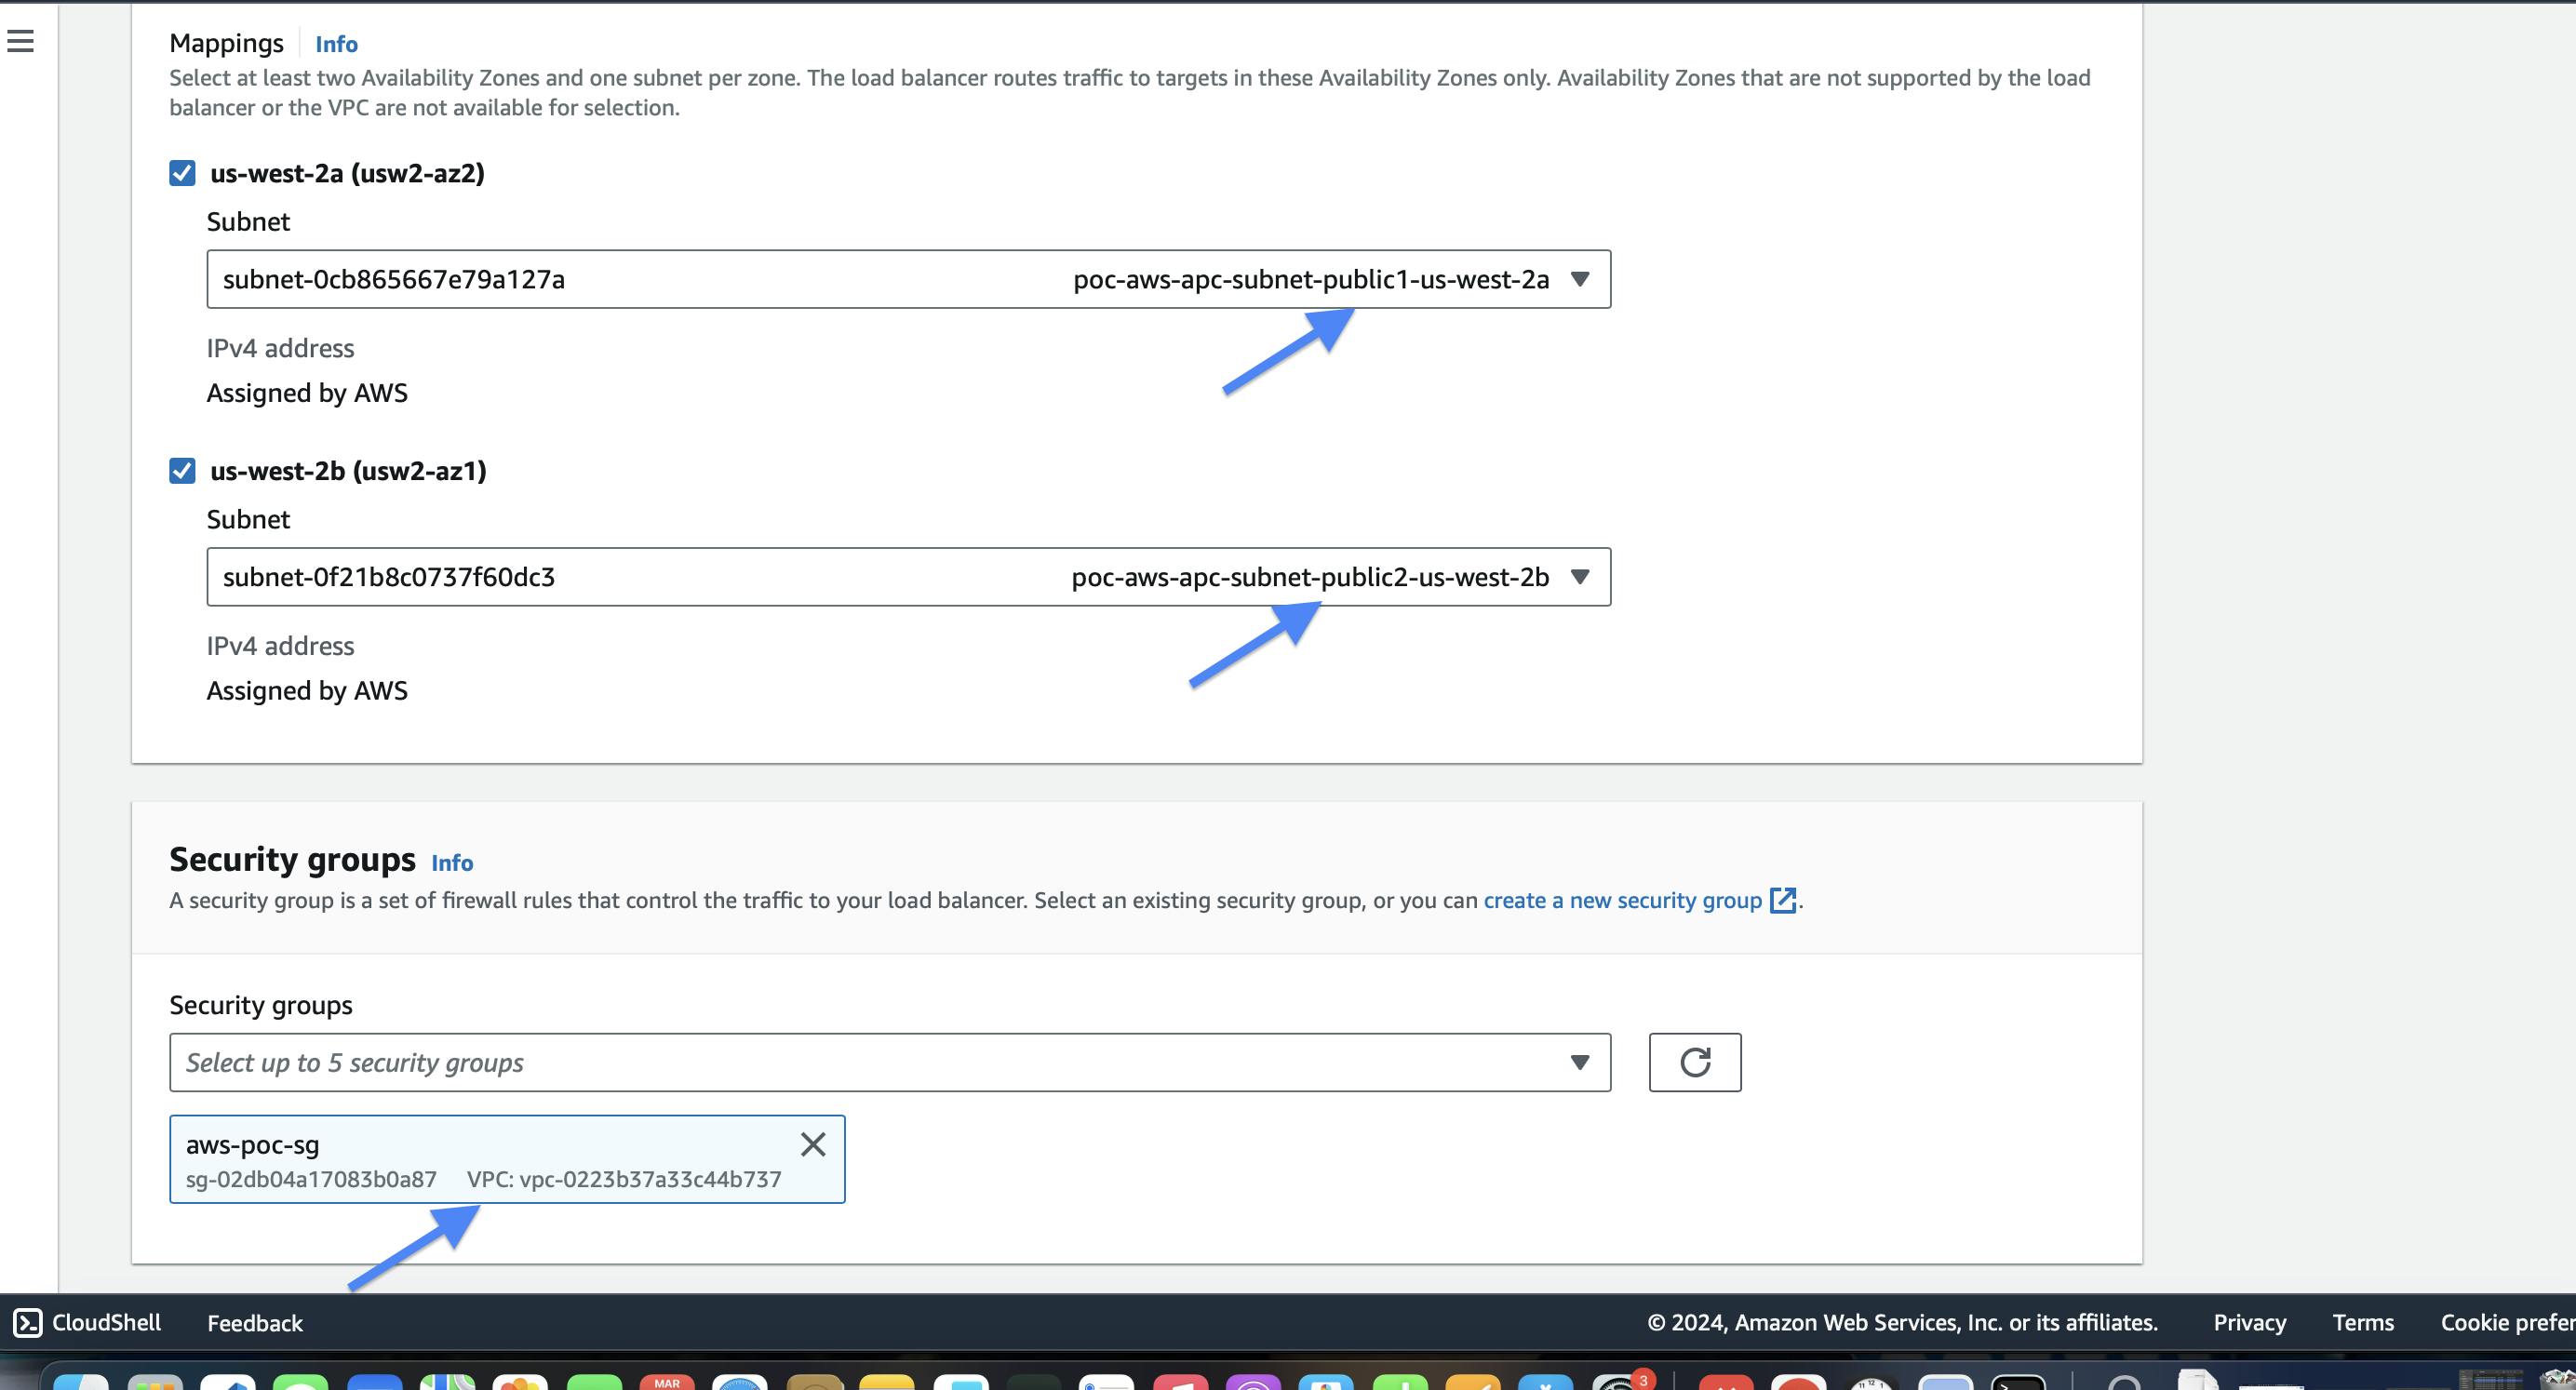
Provide the name, make sure the load balancer is internet facing and select the VPC in which the load balancer is to be created

Scroll down, and make sure you are mapping to the public subnet and select the security group that we created while creating VPC (which allows SSH and opens port 5000)
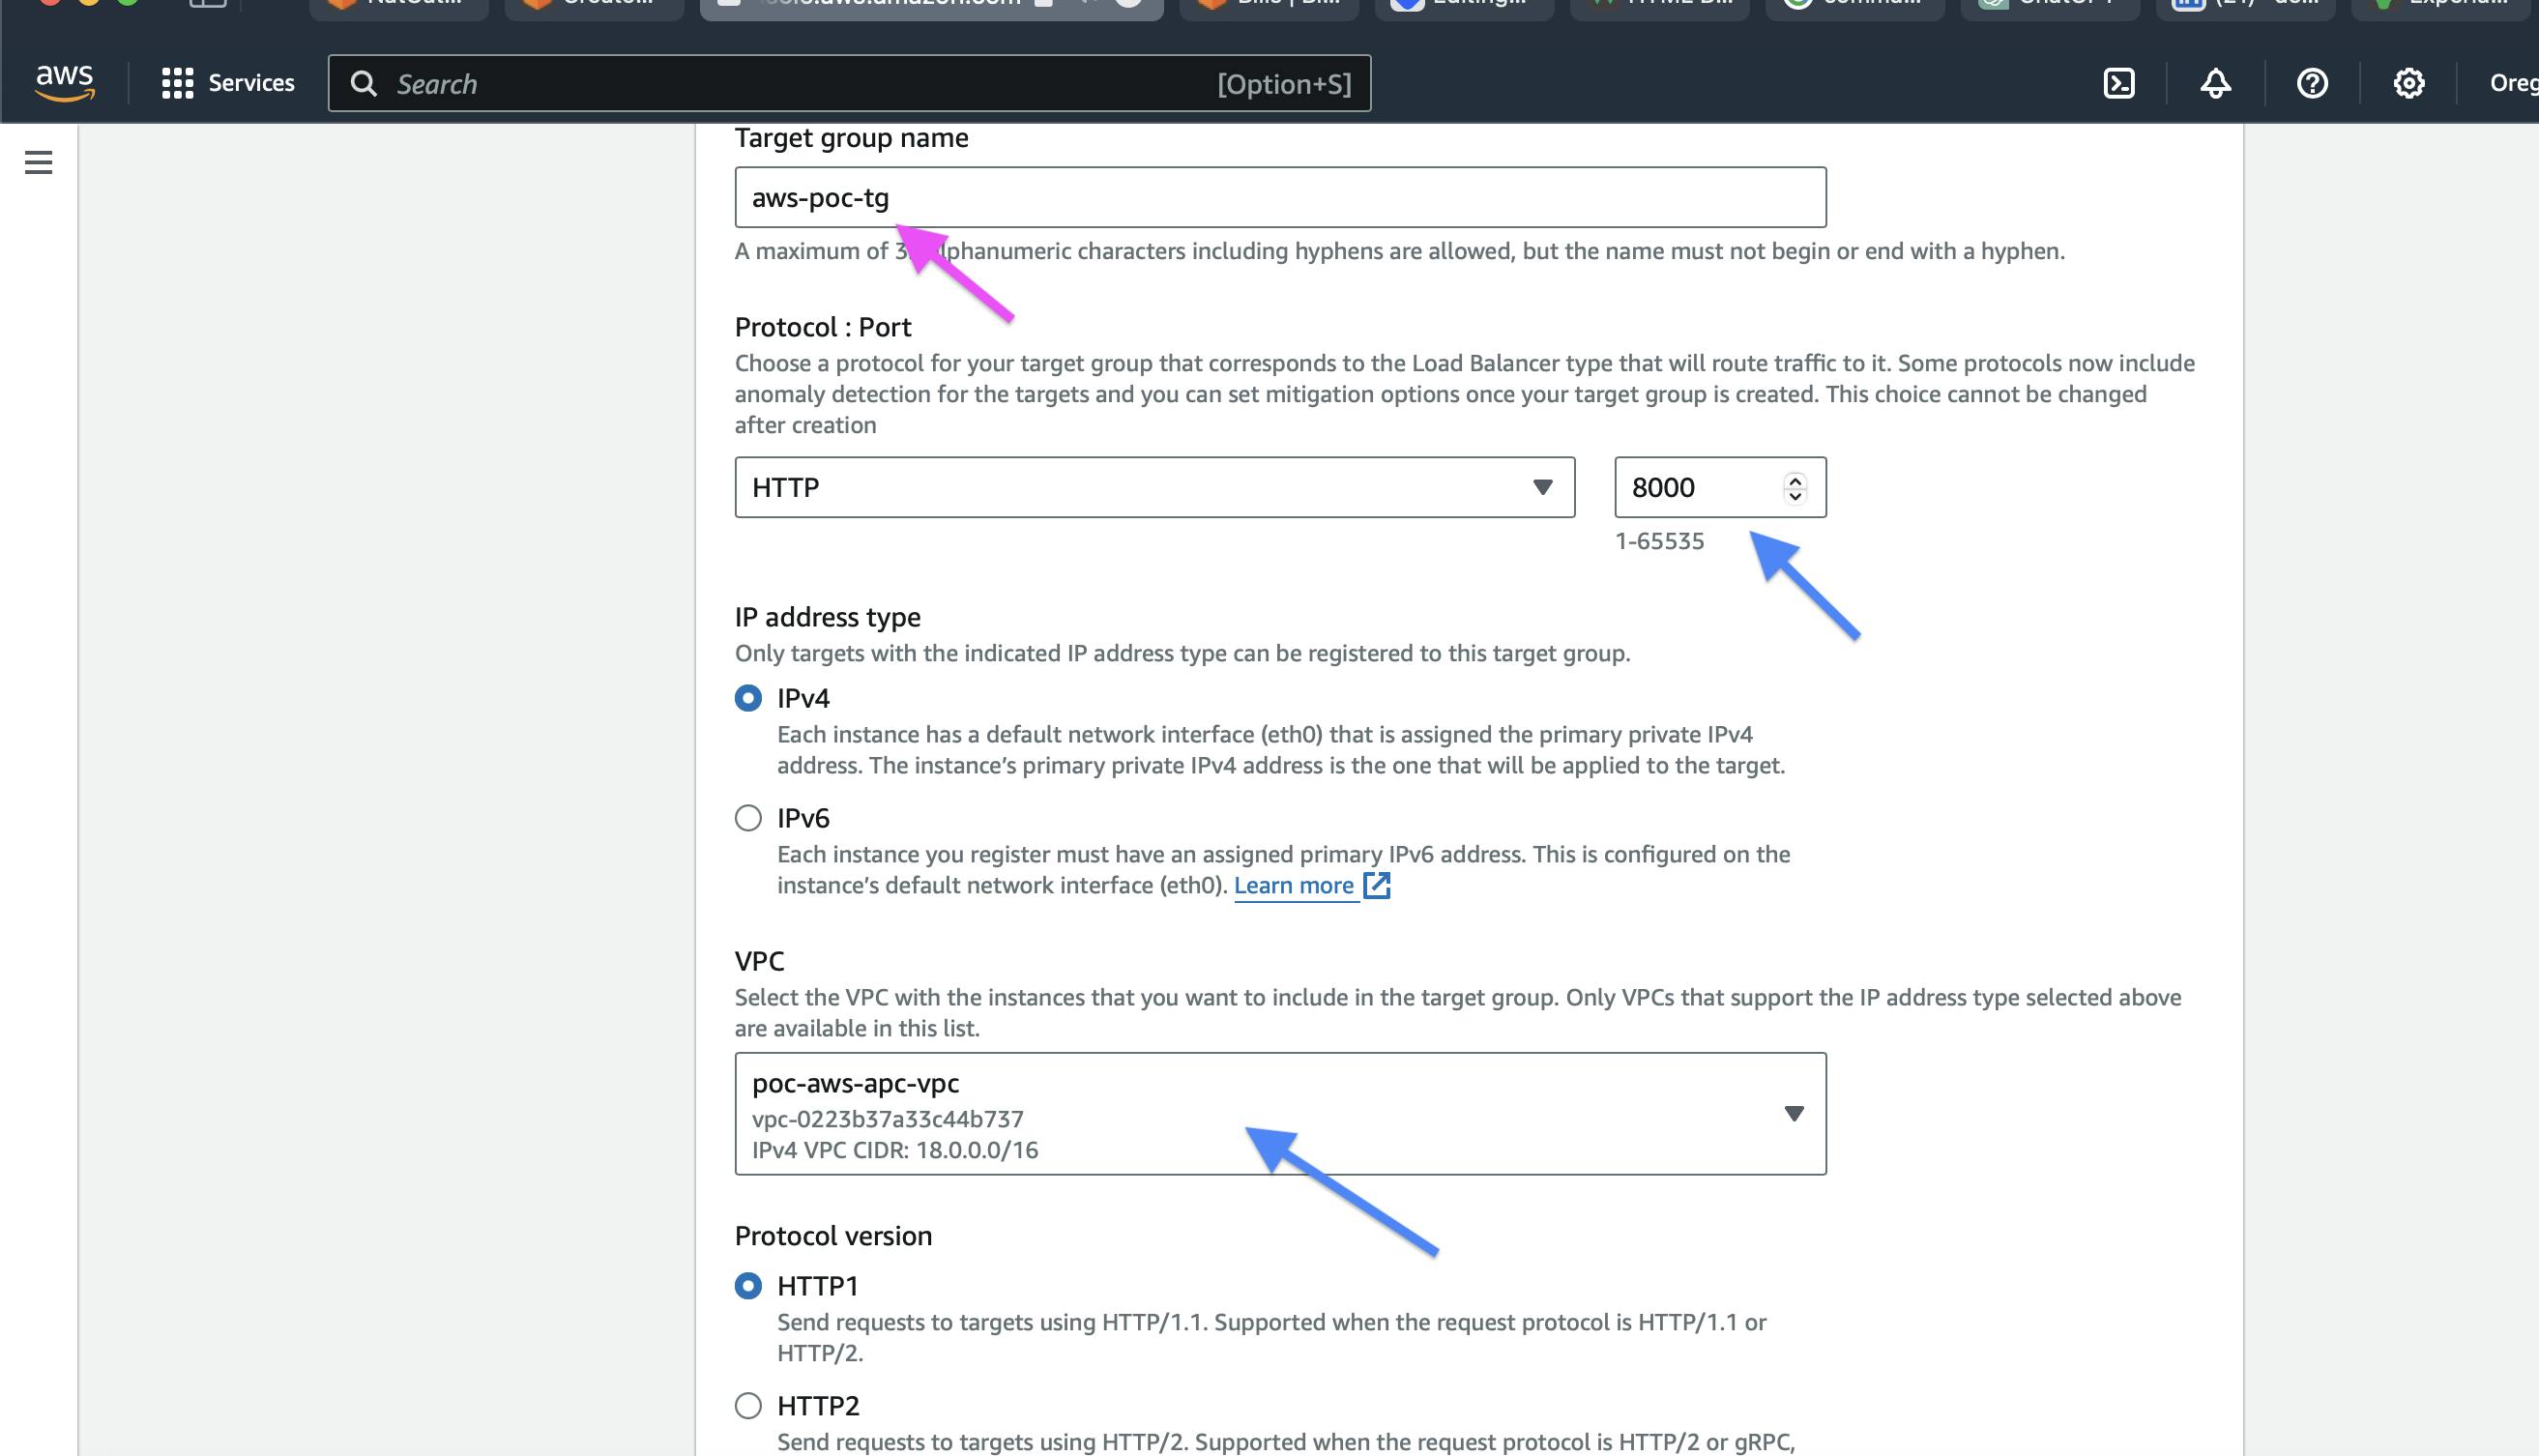
Sroll further more, in the listeners section, select "Create target group "
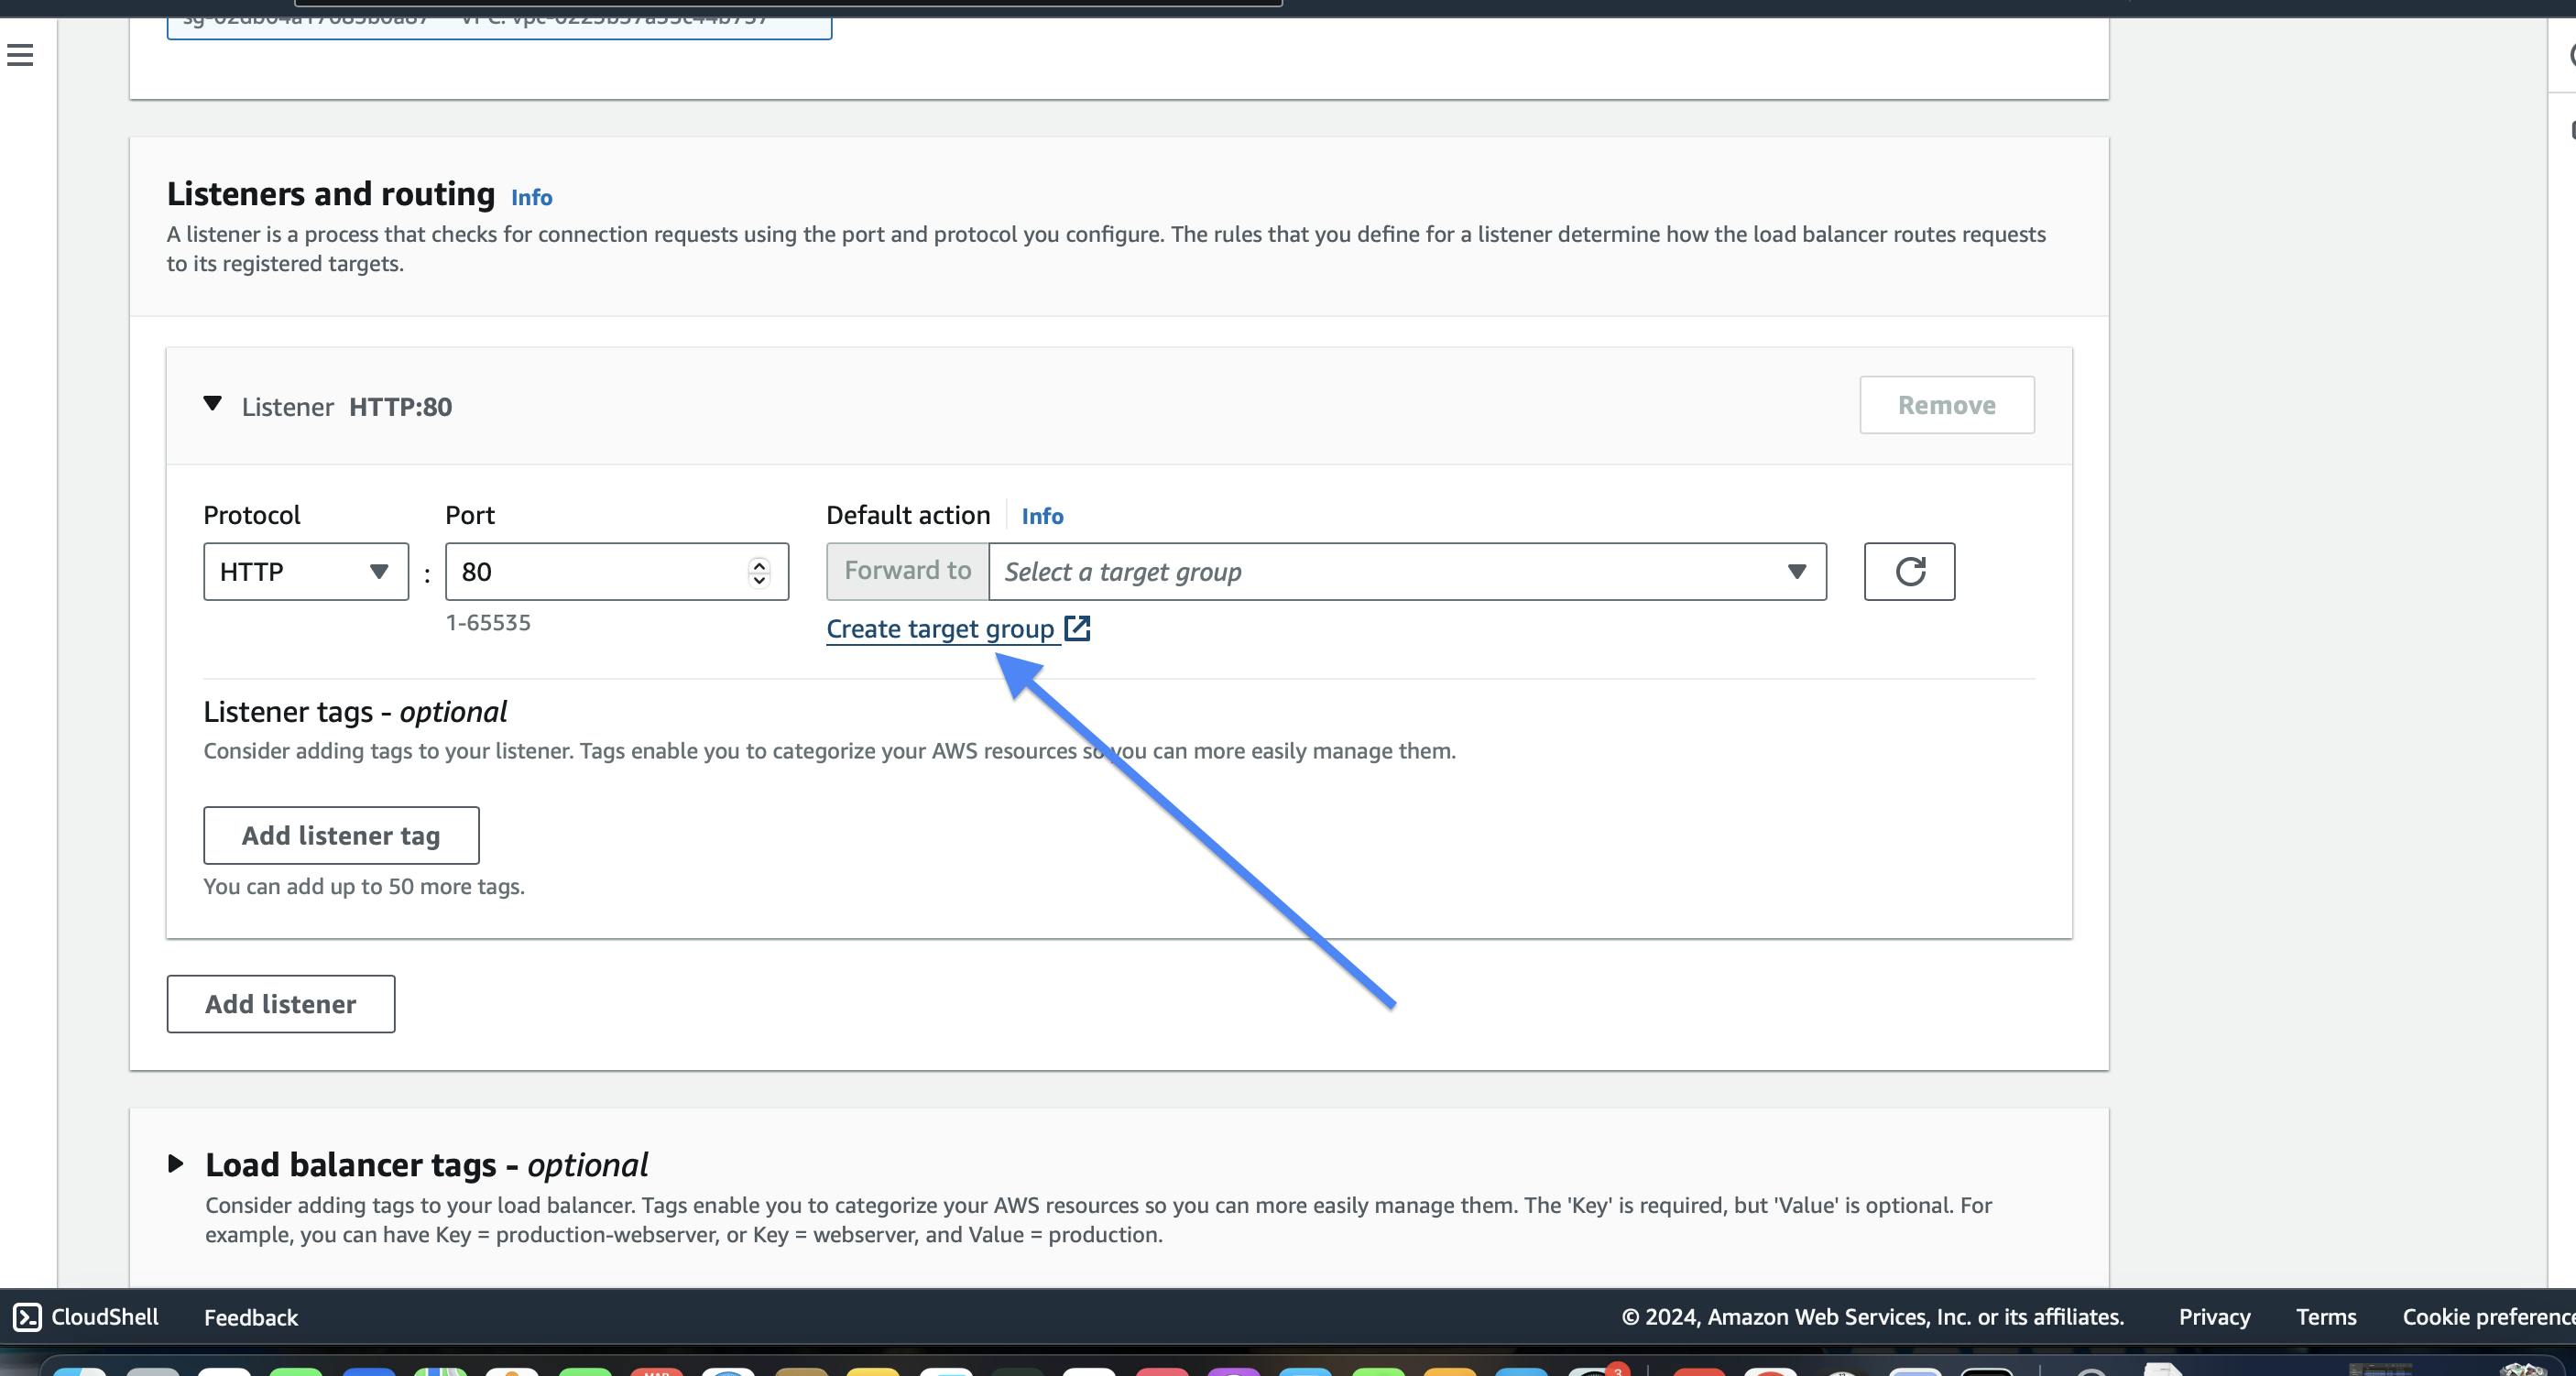
Seclect Instances>Click next

Name the target group,Open port 5000 for this target group
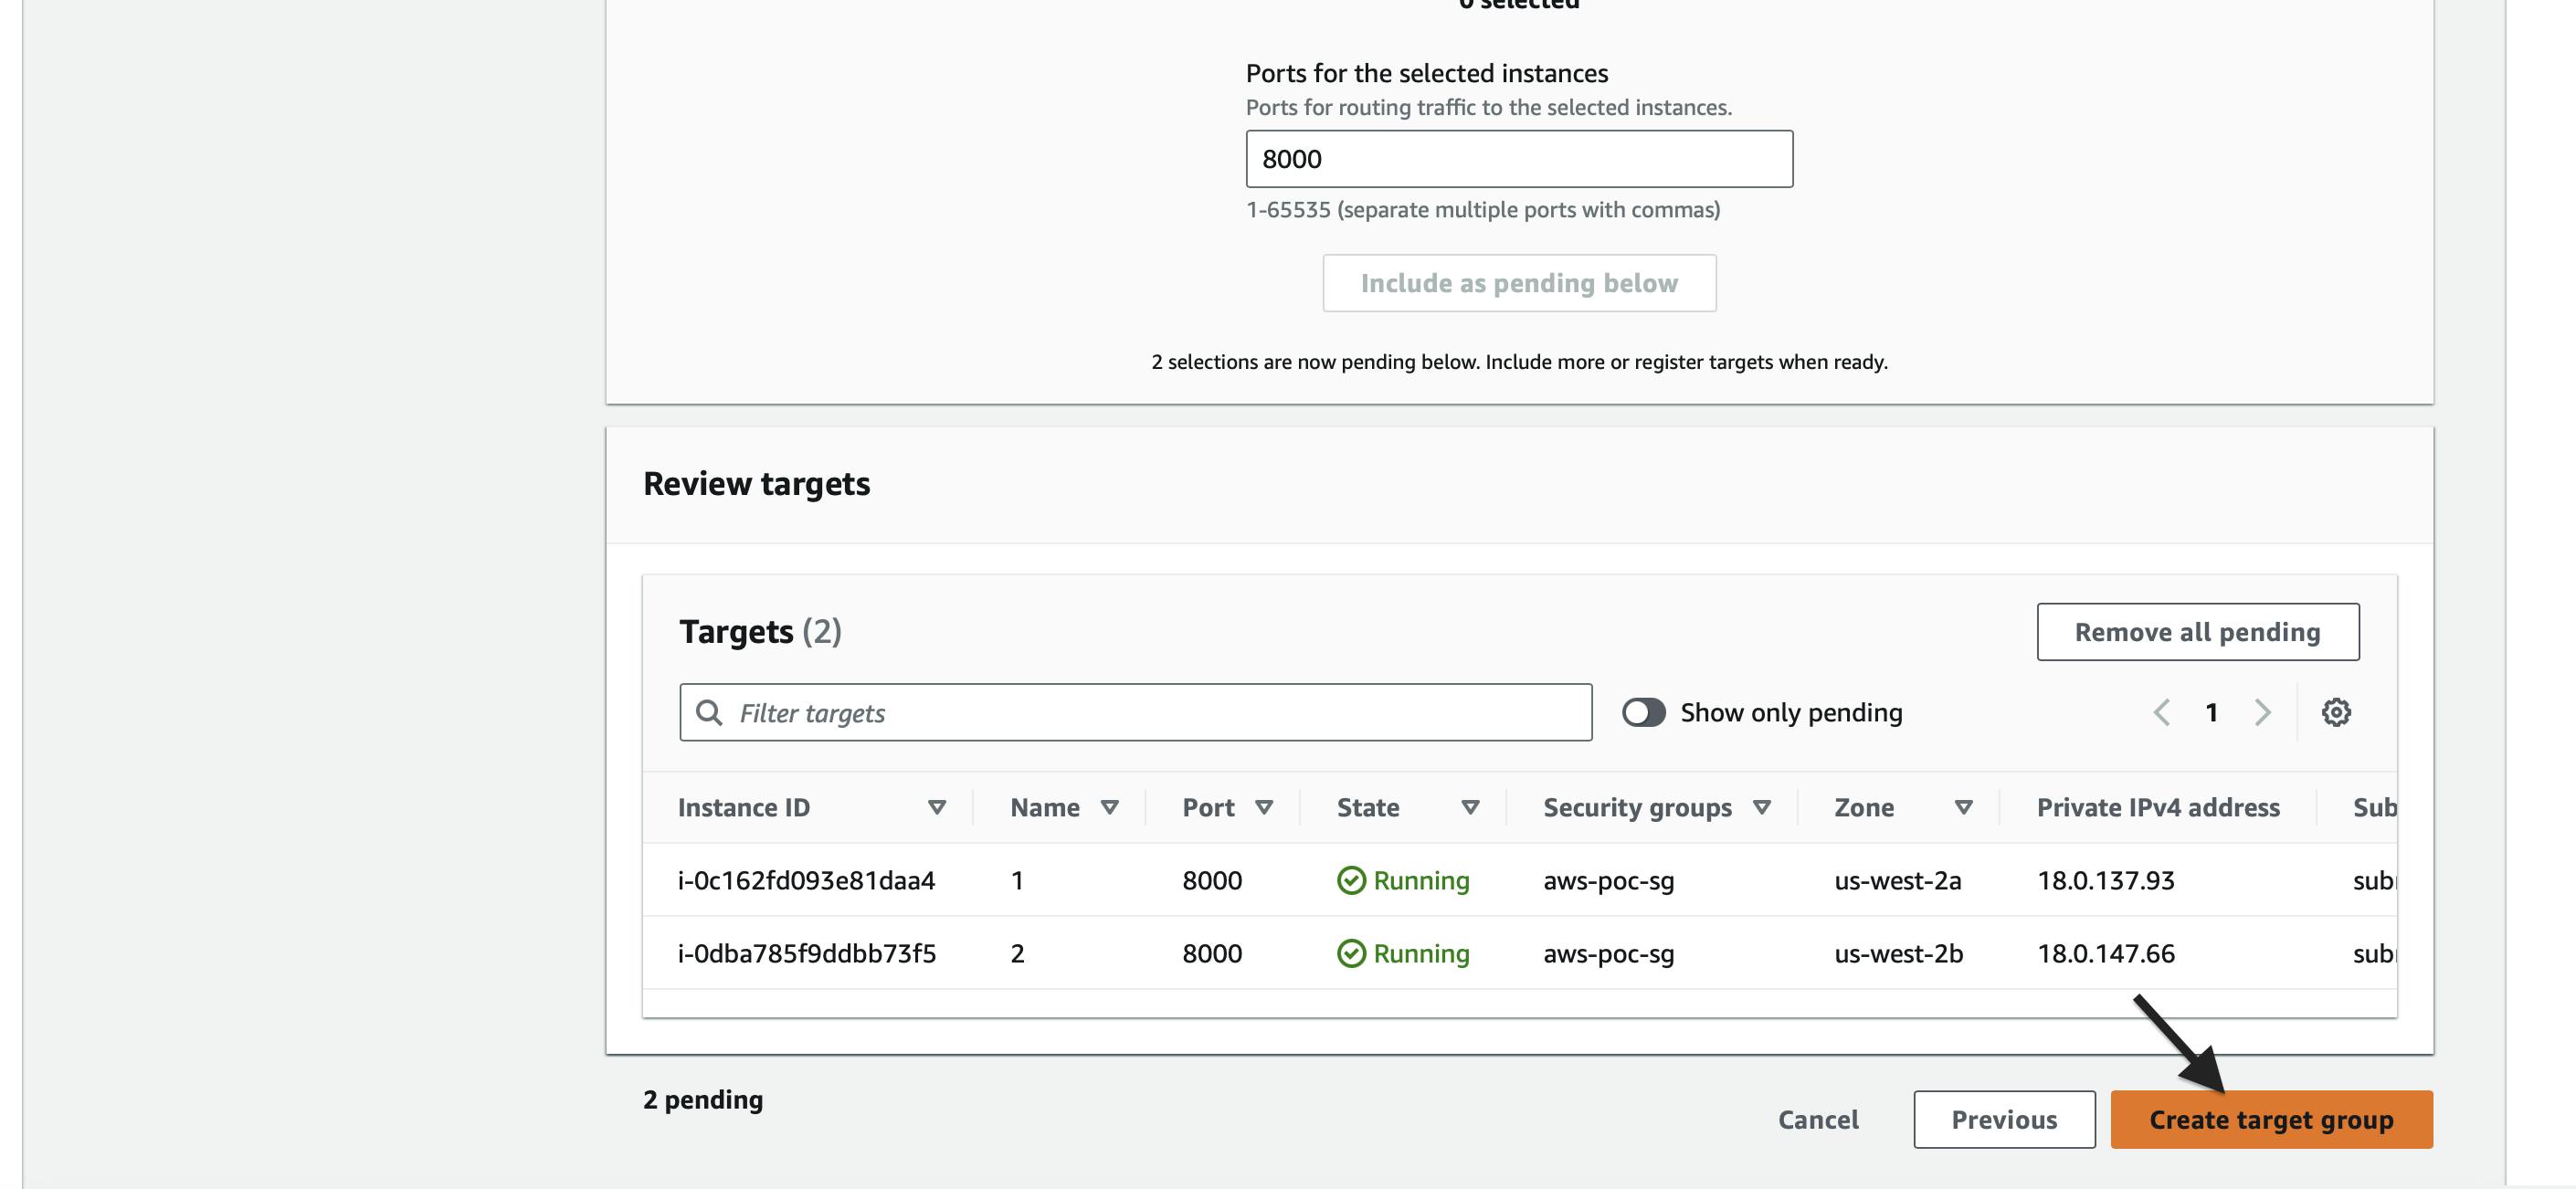
Click Next > Add the instances that we created in private subnet to this target group > Click on "Include as pending below "

Scroll down, click on "Create target group"
You wil be landed in the below page

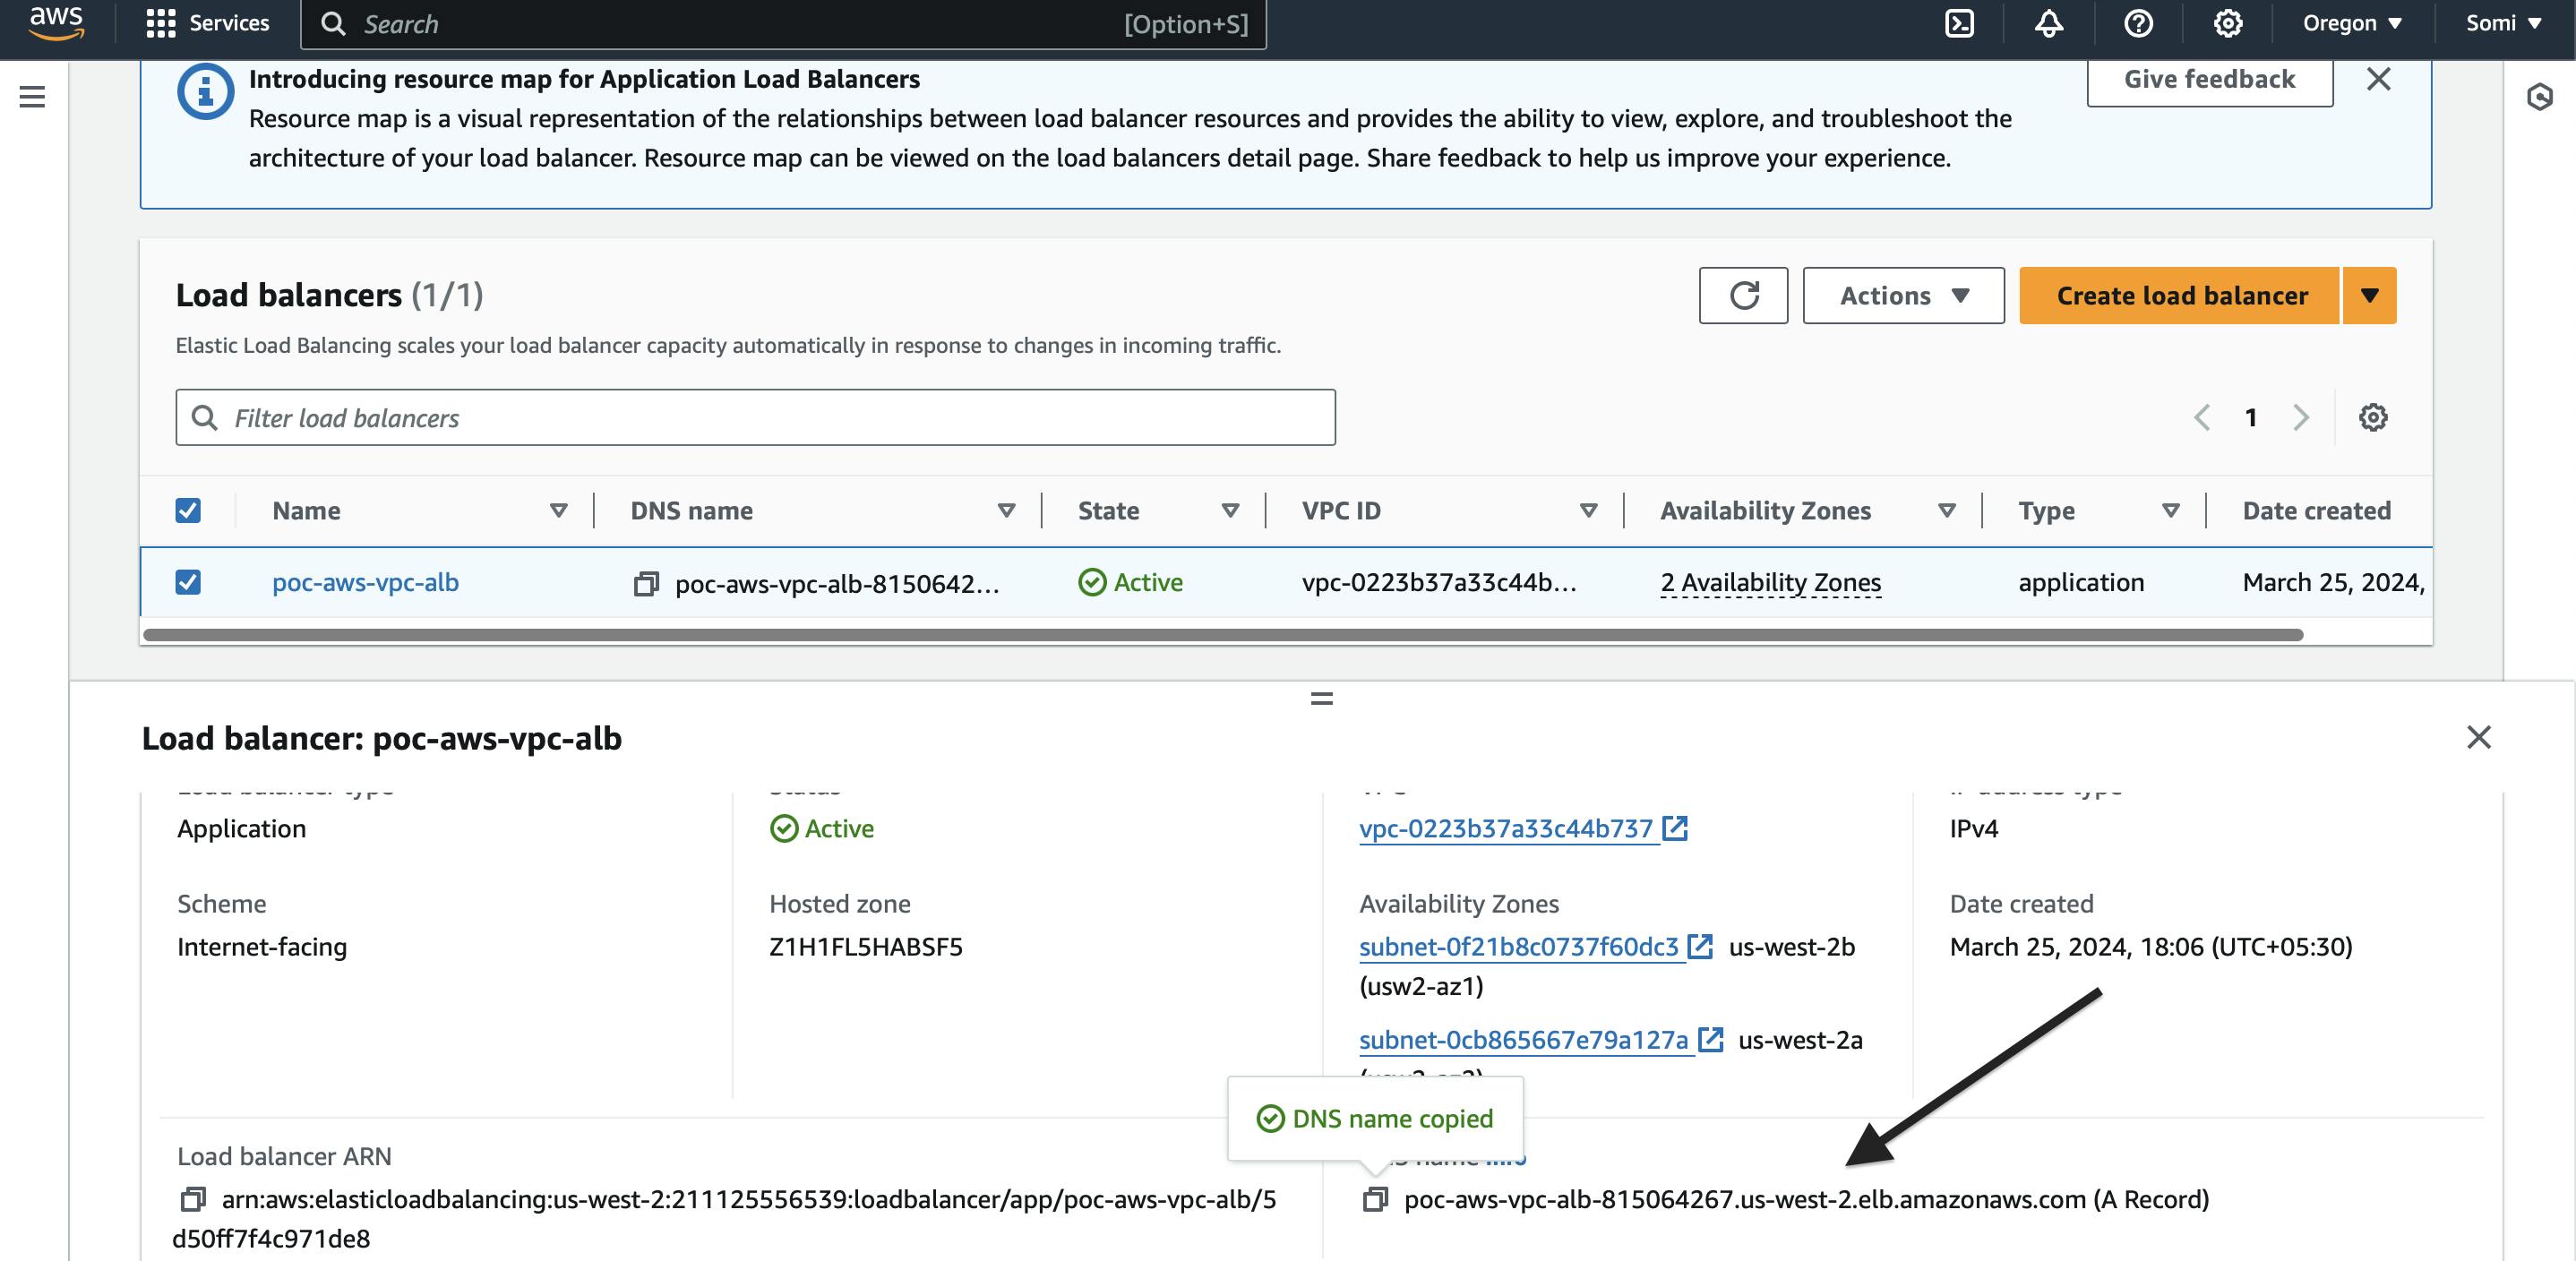
Now, go back to the Application load balancer page, attach this newly created target group and click on "Create load balancer"

You will now be directed to this page

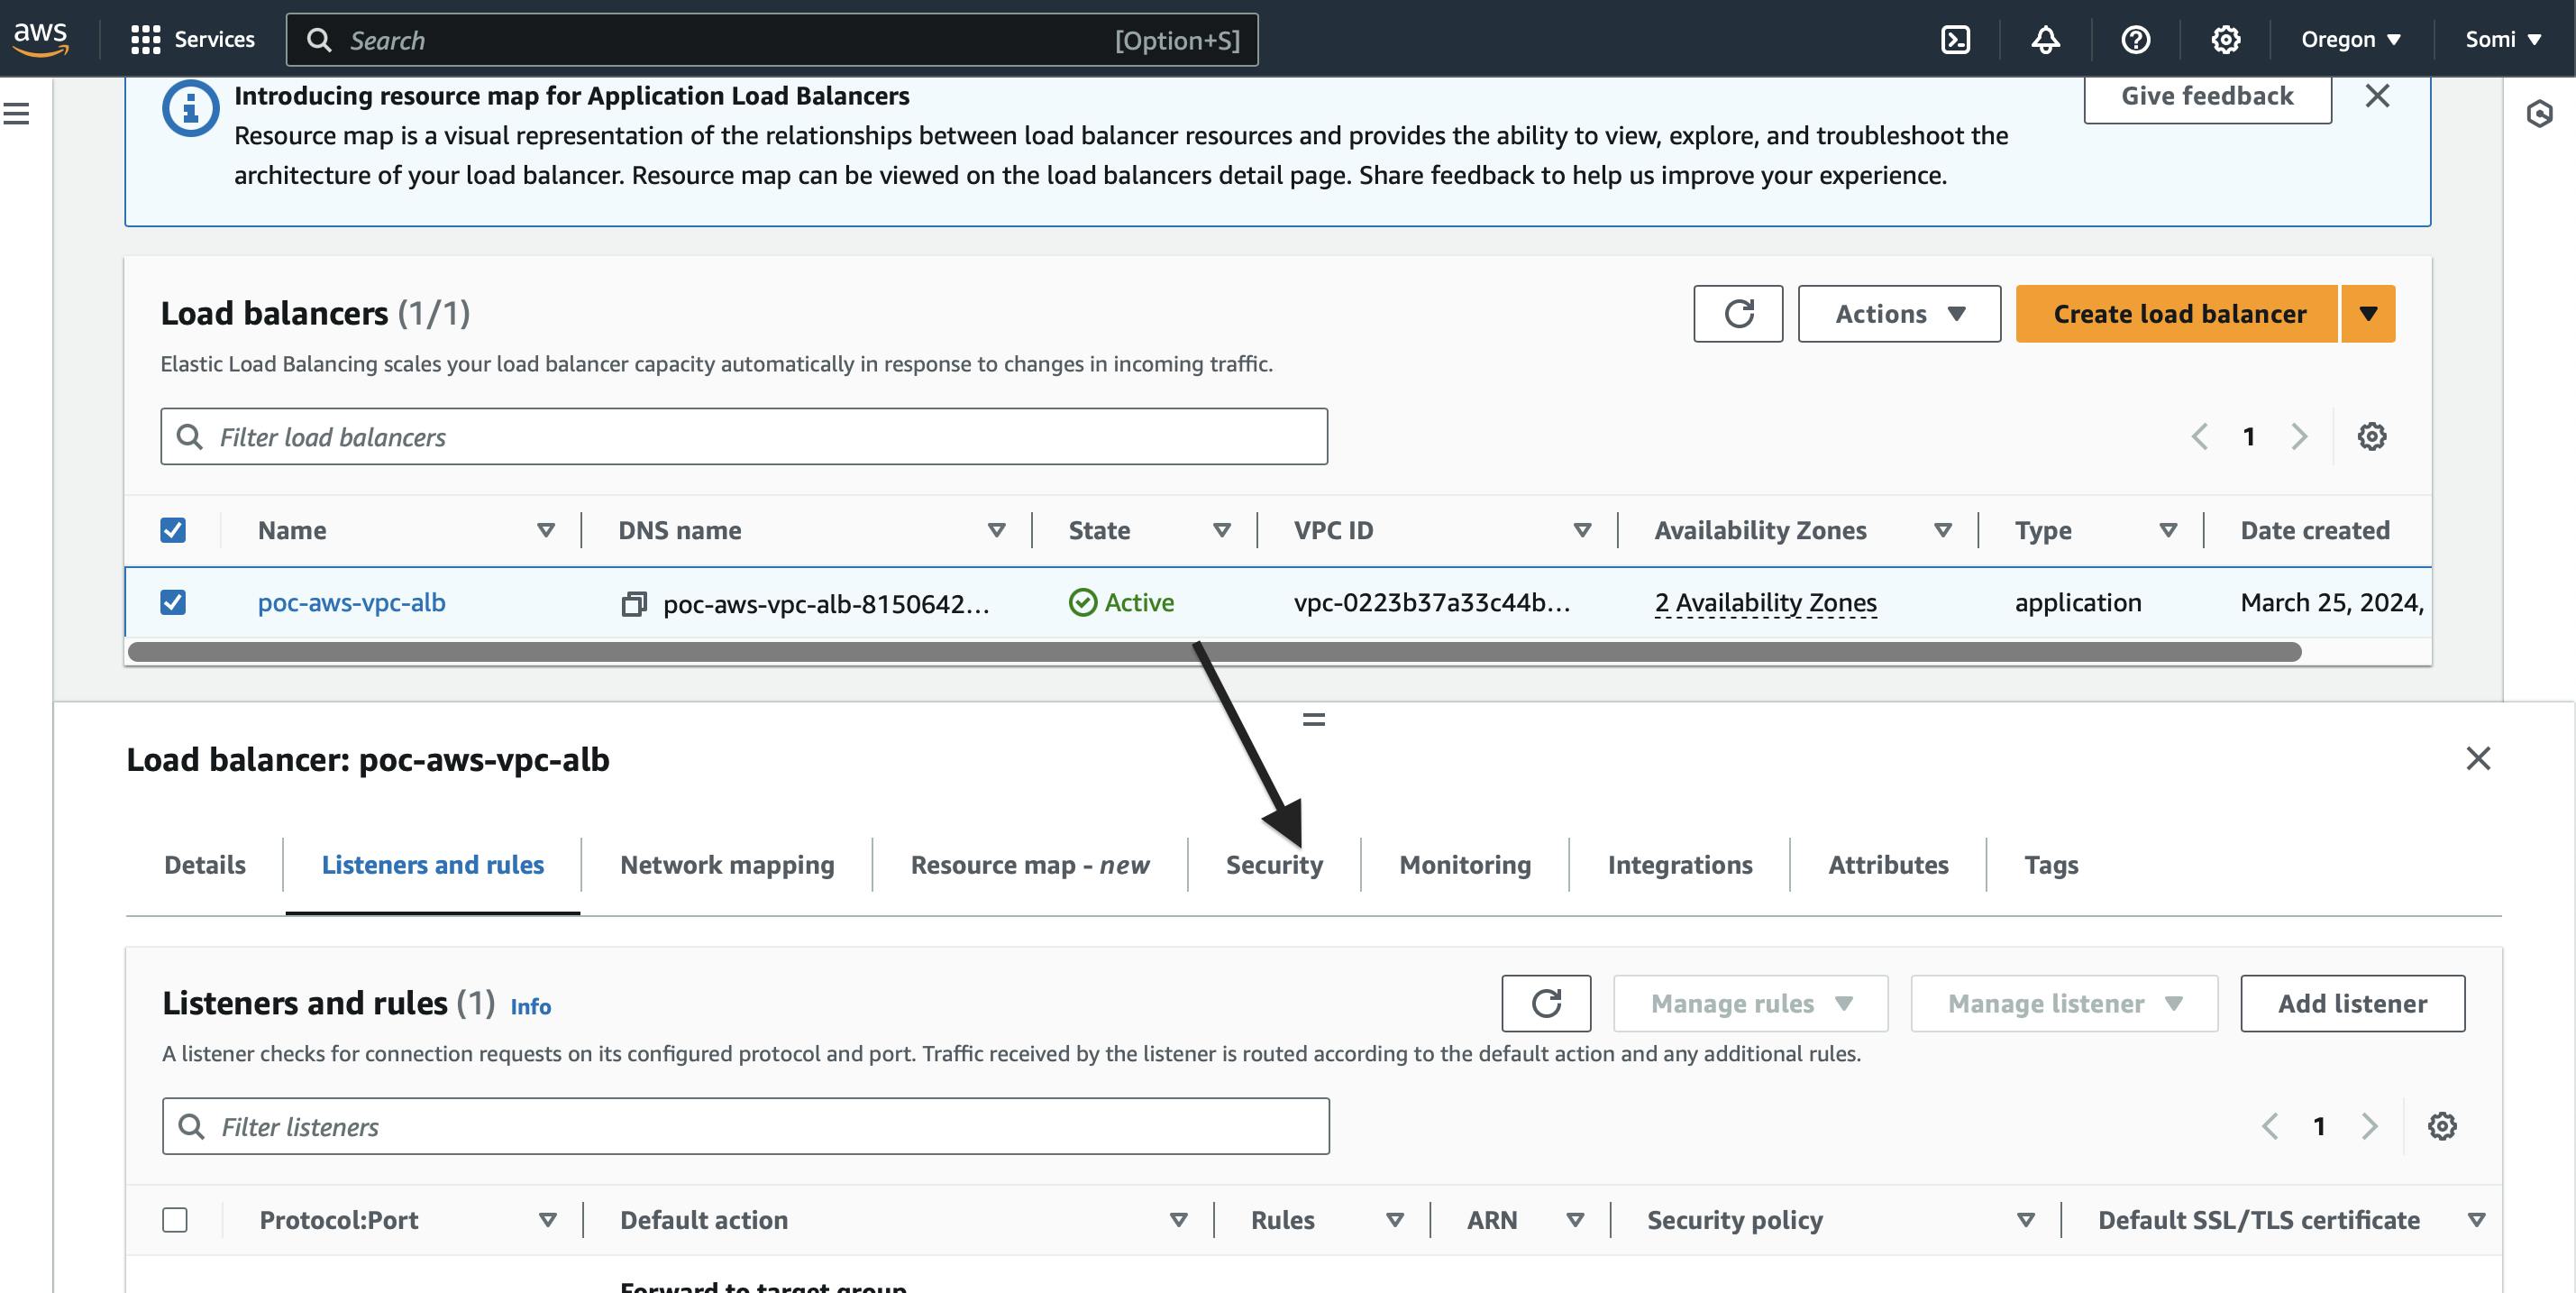
Select the loadbalancer, scroll down and check if everything is properly configured
We can find an error related to port 80 in the listener section

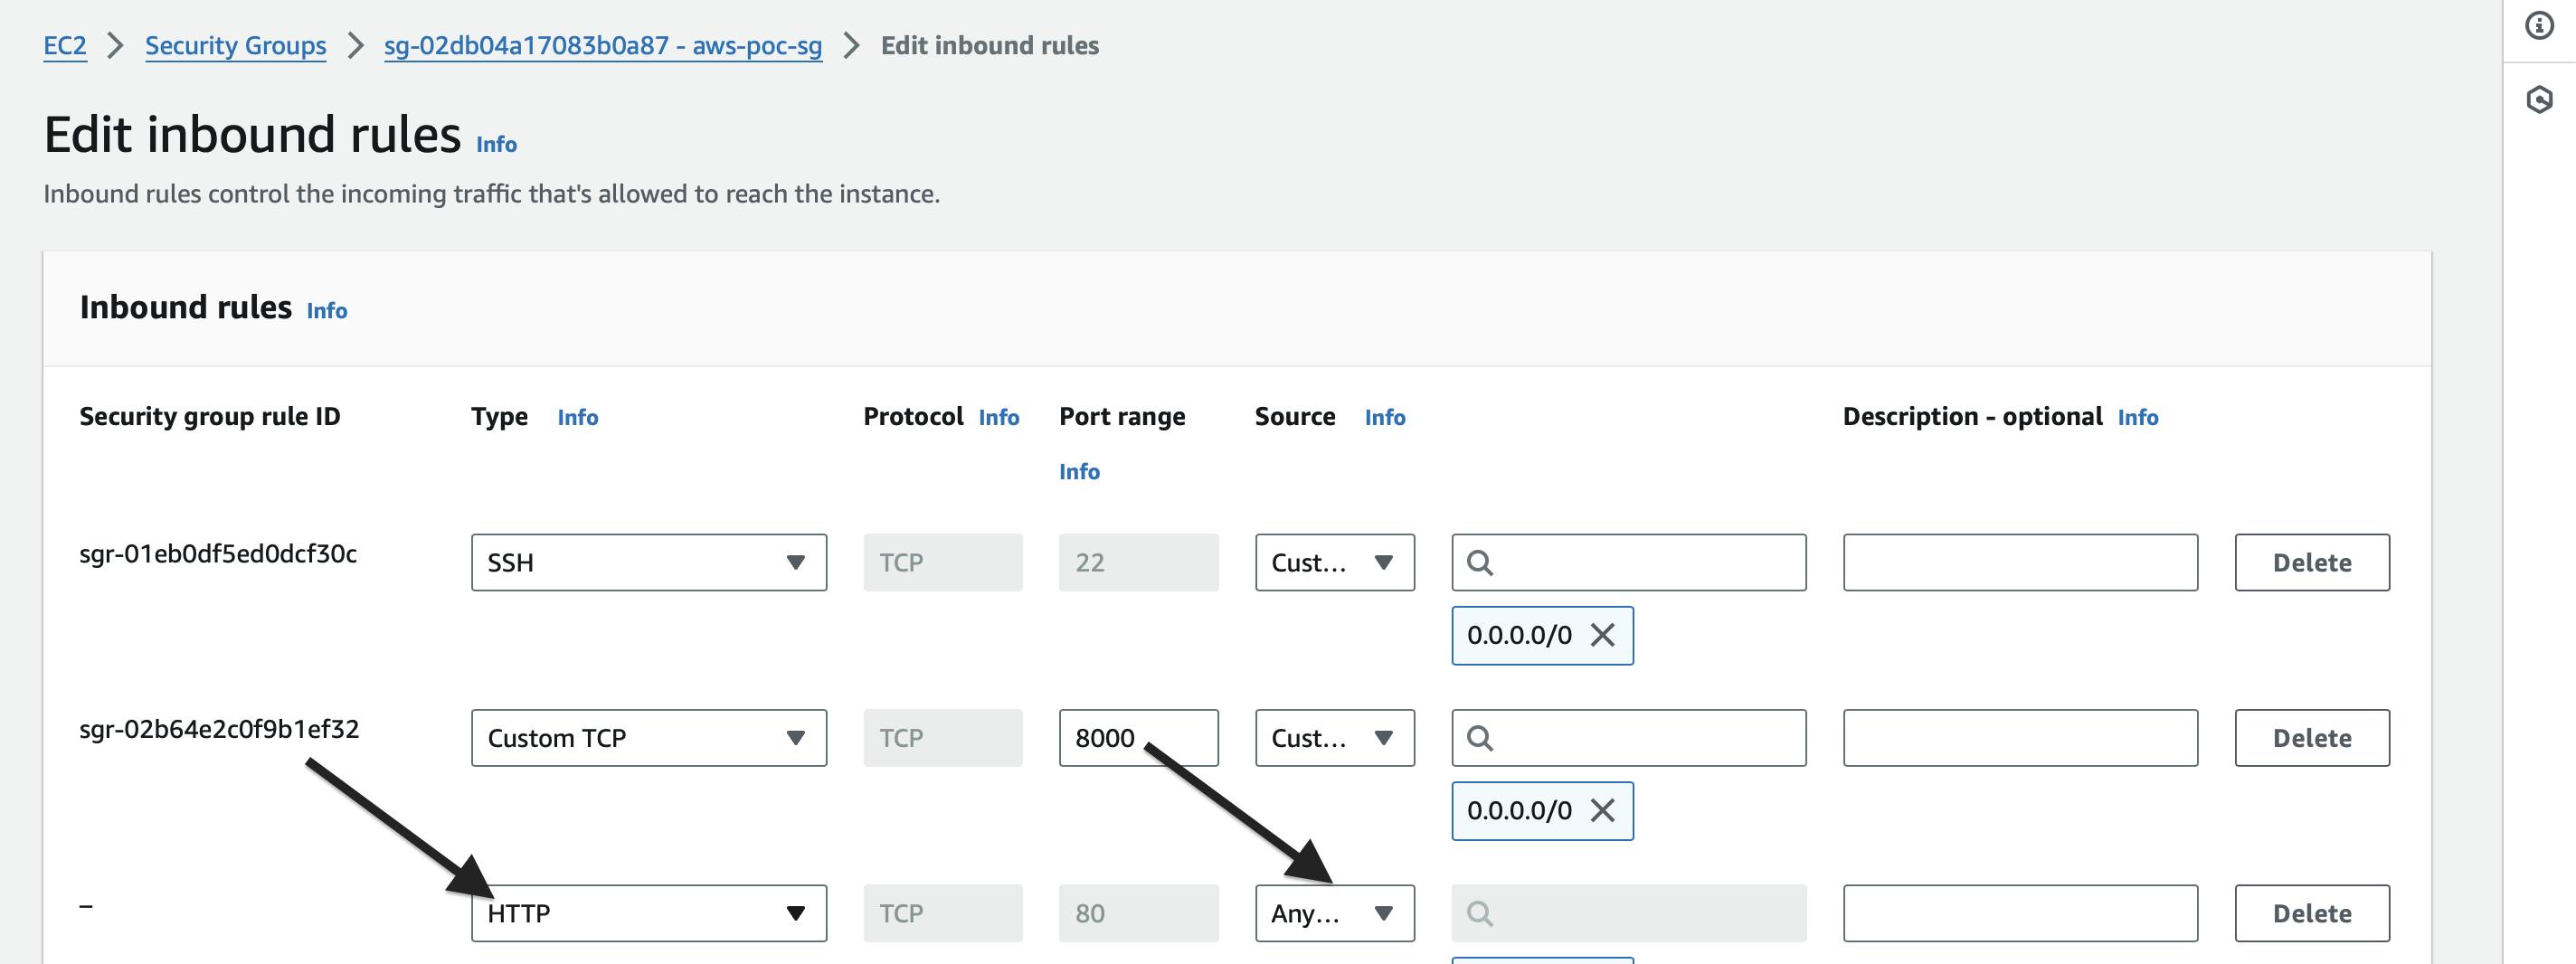
This is happening as we have not opened the port for HTTP request. To solve ths error, go to the secuity tab
Click on security group ,allow http requests from anywhere
Now, come back to Load balancer page. Scroll down and Copy the DNS name of the load balancer
Try to access this on internet
We can see that initially server1 will open
If we continue to increase the traffic, or stop the server1 manually , the load balancer routes the traffic to server 2
